
Heroku
Heroku
(HE-100) Naming Standards
The following naming standards apply to all apps in Heroku:
The name of the Heroku App must match the repository name
Rationale:
Naming conventions are crucial for managing the large number of different applications we support
Alternatives:
None
Exceptions:
None
SSL
Enabling SSL is as easy as switching it on in the settings tab.
Click Configure SSL
Choose Automatic Certificate Management (ACM)
Done
FAQ
How do we get a new or existing Heroku account?
Your APL will provide your team access to a Heroku application as needed in a Lambda School managed Heroku account
Heroku Node Deployment
Heroku

As Associate Product Lead and Technical Project Leads you'll be responsible for provisioning Heroku accounts for your students, configuring the applications to use a Postgres addon, and granting access to the provisioned app to the students who need it (should be WEB students primarily).
Currently only APLs will have full admin access to apps.
There are some settings any team member can perform, eg. Environment Variables
Steps to setting up and provisioning Heroku apps - APLs
If you haven't gotten admin access to Heroku yet please ask you engineering manager to set that up using your Lambda School Student Email (@lambdastudents.com)
Log into the Heroku console using your Lambda issued student email.
You should have received access to the console from your engineering manager.
Click on the
Newbutton in the top right cornerName the app using our Labs naming convention:
productname-team-apii.e.ecosoap-a-api

Configuring the PostgresQL add-on - APLs
PostgresQL add-on - APLsSelect the app and click on
OverviewSelect
Configure Add-onsSearch for
PostgresandHeroku Postgresshould appear in the list of optionsSelect
Heroku Postgresand select ->Hobby Basic - $9.00Select
Provision
Adding Members to the provisioned app - APLs
Once the app is created click on the app and select the
accesstabClick
Add Memberand add your students (please use their lambda issued emails) and TPL to the app as making sure thatView,Deploy,Operateboxes are all selected. ClickSave ChangesYour students should receive an email granting them access to their console; follow up and make sure they are able to get in
Note: For build-ons, you'll be adding students to an existing Heroku app.
Environment Variables - Any team member with access
From the application tab navigation select
SettingsSelect
Reveal Config Vars**You should already see a
DATABASE_URLassigned to the postgres add-on youset up**
Add all the proper environment variables
Deployment - APLs
Setup
Connect github

From the application tab navigation select
DeploySelect the
GitHub"Deployment Method"Find the
Connect to GitHubsection and selectLambda-School-LabsFind your app and select
ConnectDeploy from the
mainbranchSelect
Wait for CI to pass before deployEnable Automatic Deploysso that anytime a branch is merged into main
connect repo

First Deploy
There are 2 conditions where Heroku will likely not automatically deploy the app right after setup:
The events
pushfor the main branch andci_completehaven't triggeredThere is no code in the repo yet 😬😂
When your repo is ready follow these steps to complete the deploy.
run a manual deploy by hitting the
Deploy Branchbutton at the bottom ofthe page
Click
Open app; you will see the"api":"up"message if all is well.Using the heroku console run the following commands (Alternatively you
can use the heroku cli app)
bashthen you can run the following commands from the shellnpm run knex migrate:latestnpm run knex seed:runthis is optional if the team wants to start with5 profiles.


Your team is now set up! Now when someone has a PR merged into main your team's app will update across the world wide web
Next Steps
Checkout how to setup Review Apps to have Heroku automatically deploy your app for each github PR that you create.
Optionally, See the setting up a Custom Domain Guide to make sure that your API doesn't have the ugly herokuapp in it's URL.
Heroku Networking
By default, Heroku creates an endpoint for your application like this:
https://bridges-a-api.herokuapp.com/
This is okay, but if you want to use your custom product domain (e.g. a-api.bridgestoprosperity.dev) for your API, you can do this using Route 53.
In your Heroku application settings, click Add Domain
Your domain name will be a subdomain of your product domain, following the naming standards. For example, if your product domain is
bridgestoprosperity.devand your team letter is 'a', your API domain will bea-api.bridgestoprosperity.devHeroku will now issue you a specially generated domain to link traffic to your API subdomain
Open Route 53 in your AWS account
Open the hosted zone for your product
Click Create Record
Simple Routing
Define simple record
Record name: Your API domain (e.g.
a-api)Route traffic to: IP address or another value
Value: The generated name from Heroku (e.g.
concentric-turtle-7byvtq3pnb7n316b8zeu6peq.herokudns.com)Record type: CNAME
Define simple record
Create records
Now you may need to wait a while for the internet DNS system to catch up
But once it does, you can now hit your Heroku app using
a-api.bridgestoprosperity.devDone!
What's Next
If you haven't already setup Review Apps then head over to the guide for more info
Heroku Pipelines
Heroku is an amazing hosting platform for any project. Today, I spun up an app to show you how easy it is to set up a Heroku pipeline connected to a GitHub repository and have your project, front or back end, deployed in minutes with a wonderful staging environment set up.
Having a good staging environment set up can save you from accidentally running production. Trust me, I've been there. Thankfully you don't have to be a tech wizard to set up your project the right way. Setting up a pipeline for your project is as easy as hosting it. So, without further ado, let's dig in.
Technologies Discussed
GitHub
References
In addition to the links above, you can watch a full video walk through here..
Step 1
Heroku uses npm start to deploy your JavaScript projects. You can change and edit your Heroku dynos (the thing that runs npm start on your project) if you want... for money!for money

React projects are usually good to go out of the box. For back end projects you want to be passing your port number as an env variable so heroku can serve it on it's own port.
One last tip for making sure you have a successful hosting experience is to make sure you have either a package-lock.json or a yarn.lock, but never both. When you npm install packages it creates a package-lock.json and when you yarn install you get a yarn.lock. If you have both files then heroku won't know what to do and freak out.freaking out

One solution that can be particularly useful when working in a group project is adding the one your not going to be using to your .gitignore. So if you are using yarn, add package-lock.json to your .gitignore and if you're using npm, add yarn.lock. Once all of those things and good to go, your ready to make the magic happen!magic

Step 2
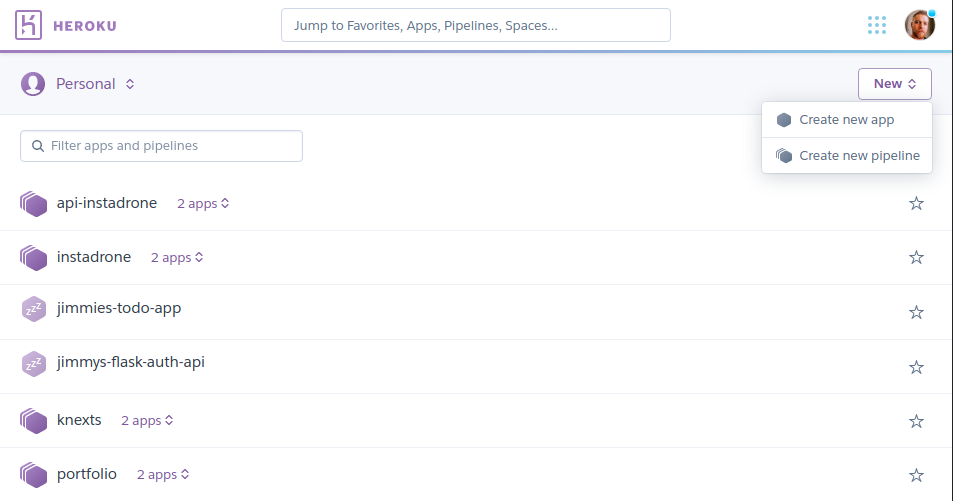
We are going to go to our heroku dashboard, where we can see all of our projects and click on new > create new pipeline.create new pipeline
Then we can give our pipeline a name and connect it to our repository. In my case, I'm going to choose the repository I created named next-app. Once you have done that, we can click on Create pipeline.set up pipeline

Once you have created your pipeline, you will see a page with three sections: review apps, staging, production.pipeline
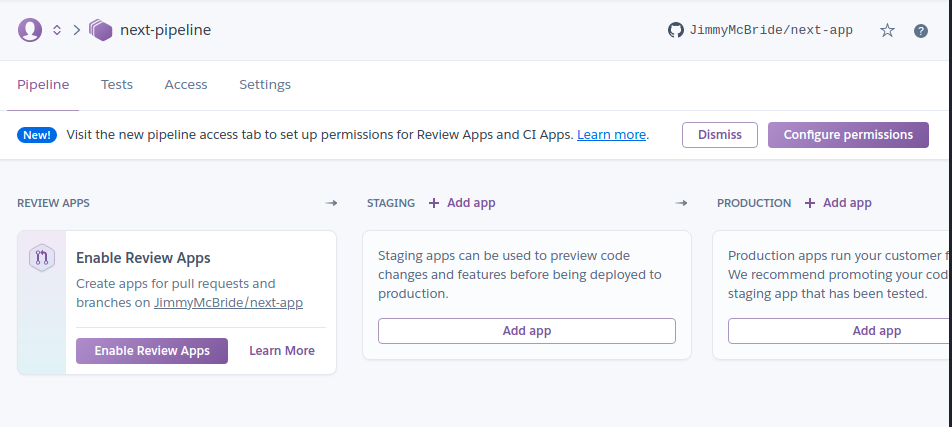
In the staging section, click Add app then Create new app....create staging app
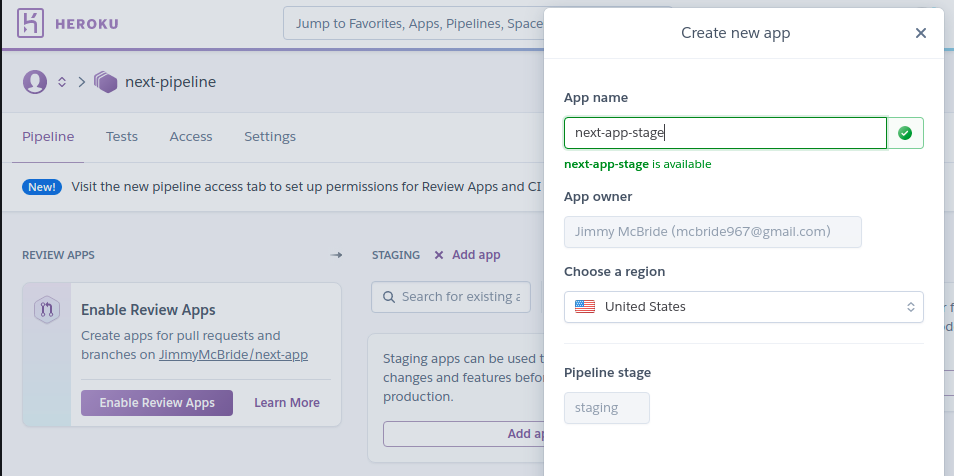
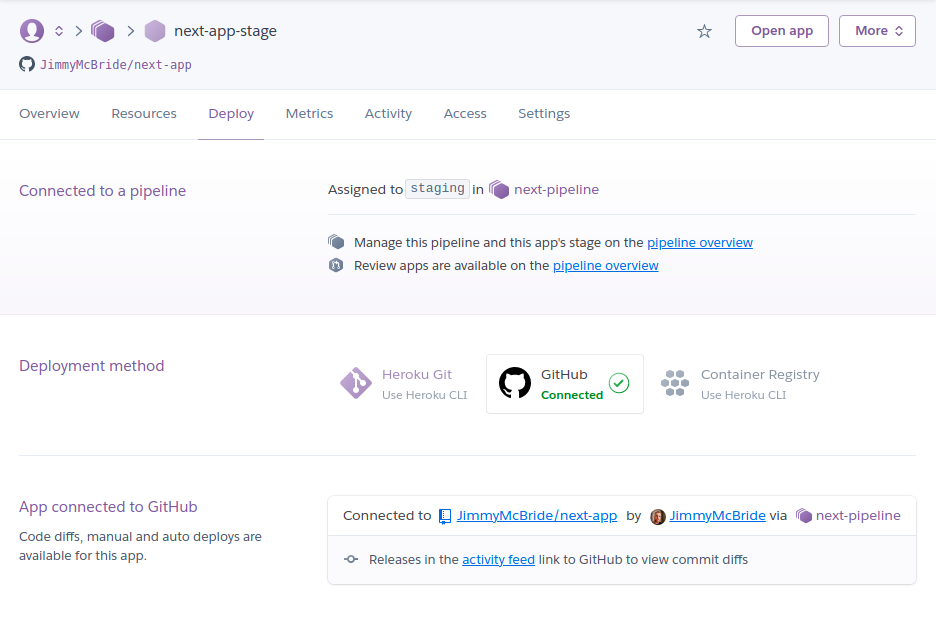
Name you staging app. I named mine next-app-stage. You're going to have multiple URLs in your staging to production set up, so it's good to reflect that in how you name them. Once you have your app named and have the appropriate region selected (I live in USA, so I keep it default), click on Create app at the bottom. Now we can see our next-app-stage app hanging out in the stage tab. Let's click on that app. Once we are viewing that app we just created, we can click on the deploy tag and see that Heroku has already taken the liberty of connecting our repository to the app.deploy tab
Step 3
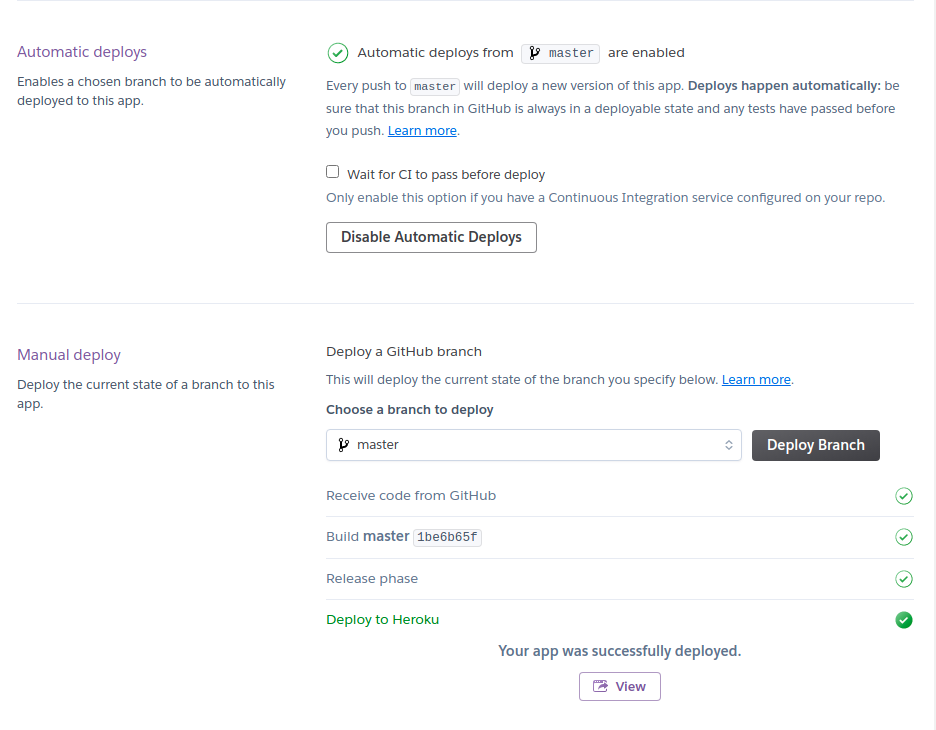
Now if our project has any env variables we want to set those fist. Click on settings > Reveal config vars to do so. My project does not have any env variables to add, so I'm just going to scroll down and click Enable Automatic Deploys then on Deploy Branch. Mine is set up to master branch, which is perfect.deployed app
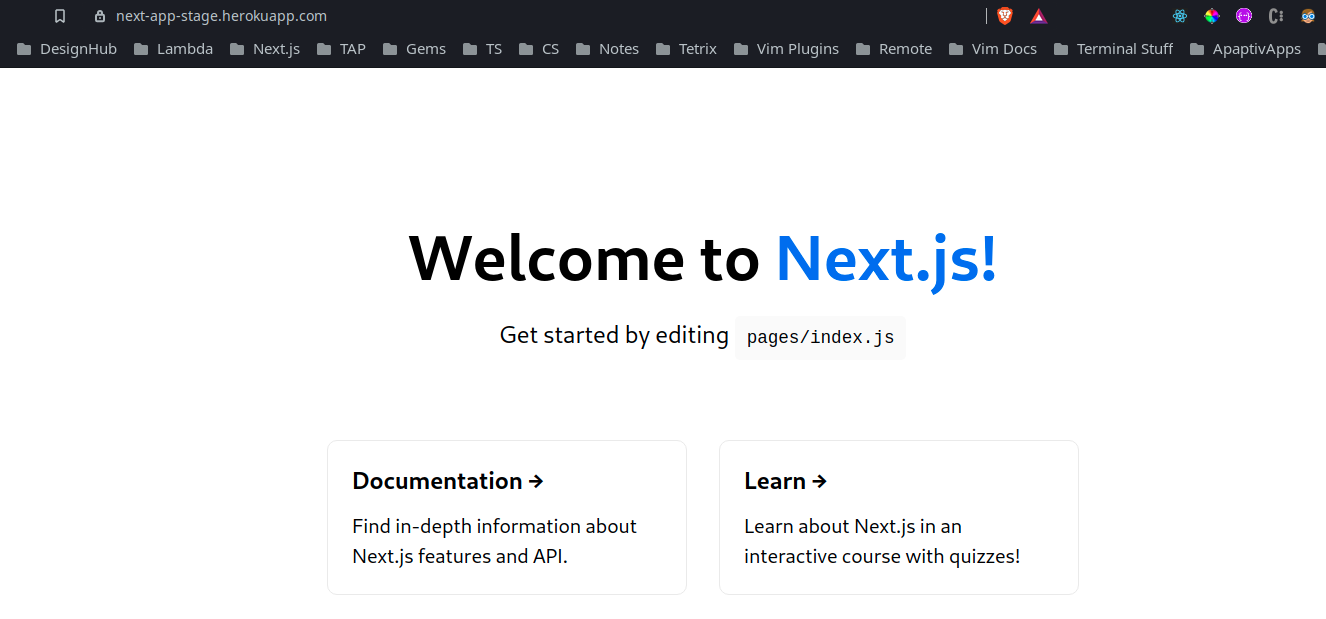
My app was successfully deployed on the first go, I can click on the view button and see that my next app is up and running! 🎉next staging app
Sweet! So far, so good. Now, since everything looks great, we can create our production app and push our changes to production. Woo hoo!
We can go back to our pipeline, click Add app and then Create new app... on the production tab. This time I'm going to name my app next-app-prod (only because next-app wasn't available, go figure) and then Create App.production pipeline added
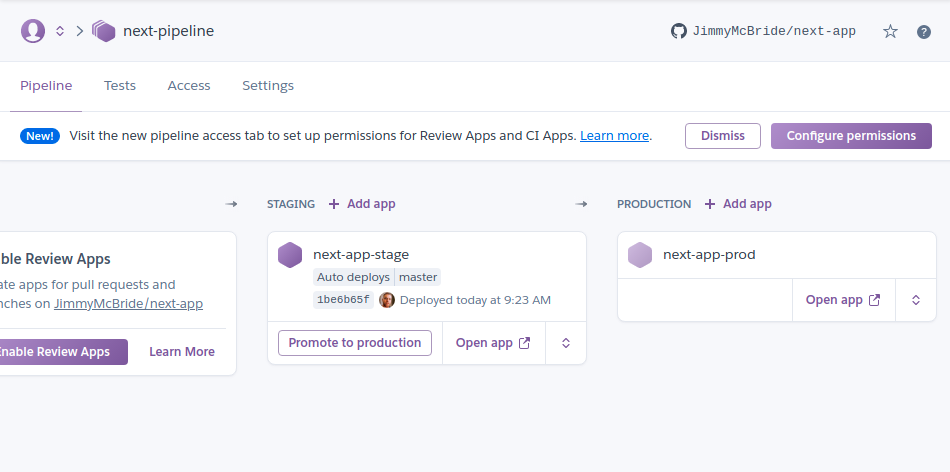
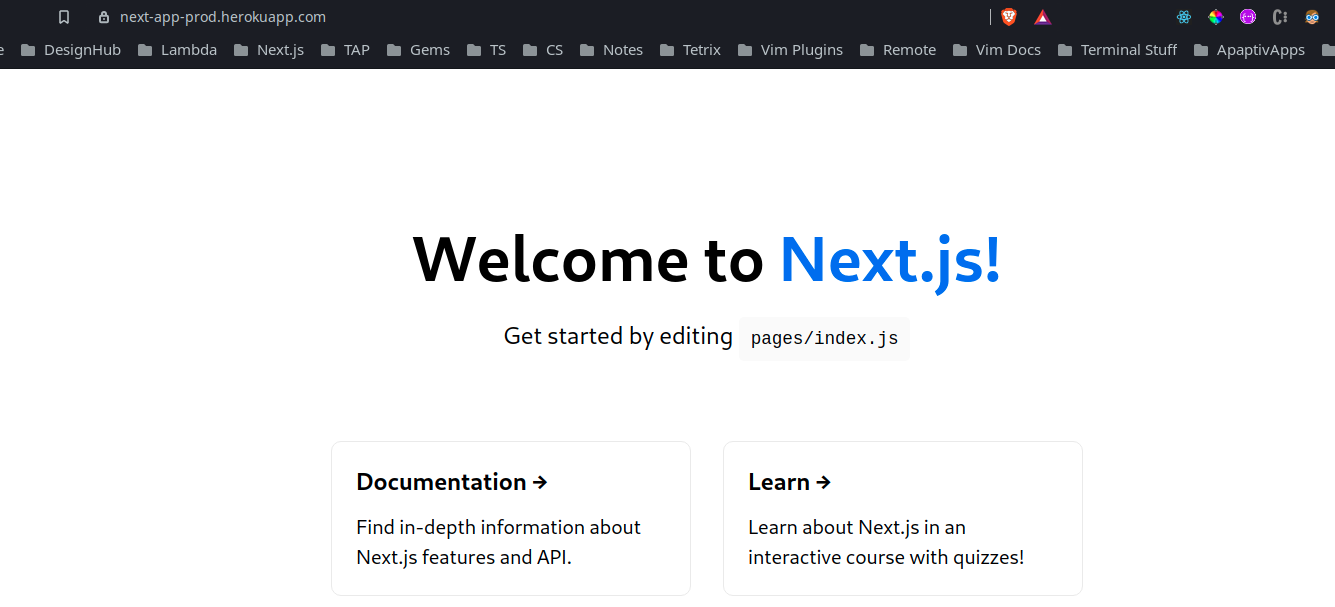
Since everything looked good on our staging app, we are going to go ahead and click the Promote to production button and then Promote. Changes should be promoted very quickly and then we can click on Open app on our production app we just created and see our site.production website
Conclusion
We did it! Notice the URL here. This is our production URL now. If you bought a custom domain, you want to go into the settings tab in your production app and you can manage your domain name from there. If you have bought a secure domain with SLL (which you totally should) you will have to upgrade you subscript from free to hobby ($7 bucks a month) for heroku to manage your SLL cert for you. Which is totally worth it in my opinion. Another amazing feature the pipeline has is that it's already set up so that if you make any pull requests to the master branch it will create a preview for that pull request that you will be able to see in the Review Apps section of your pipeline, so you can check every branch before it gets merged to master. Once it gets pushed to master, it will build and redeploy your staging app. If everything still looks and works the way it should, all you have to do is promote it to production and you are ready to rock and roll!rock and roll

Heroku Review Apps
Objective
The Review Apps Heroku Pipeline would allow one not to have to use the Heroku remote to push to the staging server on Heroku. Overall, this should allow one to increase workload capacity since the Review Apps Pipeline could cut out the learning curve of deploying to Heroku via the Heroku remote through the CLI.
Heroku deploys the HEAD commit of the branch that the associated Pull Request is created on. When the branch is updated Heroku redeploys to the connected repo on the Review Apps Pipeline with your latest commit.
In summary, this guide will help you have a better understanding of what Review Apps on Heroku does and how to set it up for your GitHub repo.
Technologies Discussed
Heroku
Review Apps Pipeline
Setting Up Review Apps Steps
1.Create a Pipeline by going to your Heroku dashboard, going to new, clicking the dropdown, and clicking on create new Pipelinecreate new pipeline

2.Make sure to add the repo you want to connect the Review Apps Pipeline toconnect repo to pipeline

3.Once on the Pipeline Dashboard click Enable Review Appsenable review apps

4.Then config Reviews Apps with your preferred settings
Automatically create review apps for new PRsDestroy stale review apps automatically- set to preferred time frame
config pipeline

References
For more information about setting up Review Apps on Heroku click here
Last updated