Strings Continued
Working with Strings
Let’s look at some of the ways Python lets you write, print, and access strings in your code.
String Literals
Typing string values in Python code is fairly straightforward: they begin and end with a single quote. But then how can you use a quote inside a string? Typing 'That is Alice's cat.' won’t work, because Python thinks the string ends after Alice, and the rest (s cat.') is invalid Python code. Fortunately, there are multiple ways to type strings.
Double Quotes
Strings can begin and end with double quotes, just as they do with single quotes. One benefit of using double quotes is that the string can have a single quote character in it. Enter the following into the interactive shell:
>>> spam = "That is Alice's cat."
Since the string begins with a double quote, Python knows that the single quote is part of the string and not marking the end of the string. However, if you need to use both single quotes and double quotes in the string, you’ll need to use escape characters.
Escape Characters
An escape character lets you use characters that are otherwise impossible to put into a string. An escape character consists of a backslash (\) followed by the character you want to add to the string. (Despite consisting of two characters, it is commonly referred to as a singular escape character.) For example, the escape character for a single quote is '. You can use this inside a string that begins and ends with single quotes. To see how escape characters work, enter the following into the interactive shell:
>>> spam = 'Say hi to Bob's mother.'
Python knows that since the single quote in Bob's has a backslash, it is not a single quote meant to end the string value. The escape characters ' and " let you put single quotes and double quotes inside your strings, respectively.
Table 6-1 lists the escape characters you can use.
Table 6-1: Escape Characters
Escape character
Prints as
'
Single quote
"
Double quote
Tab
Newline (line break)
\
Backslash
Enter the following into the interactive shell:
>>> print("Hello there!\nHow are you?\nI'm doing fine.") Hello there! How are you? I'm doing fine.
Raw Strings
You can place an r before the beginning quotation mark of a string to make it a raw string. A raw string completely ignores all escape characters and prints any backslash that appears in the string. For example, enter the following into the interactive shell:
>>> print(r'That is Carol's cat.') That is Carol's cat.
Because this is a raw string, Python considers the backslash as part of the string and not as the start of an escape character. Raw strings are helpful if you are typing string values that contain many backslashes, such as the strings used for Windows file paths like r'C:\Users\Al\Desktop' or regular expressions described in the next chapter.
Multiline Strings with Triple Quotes
While you can use the \n escape character to put a newline into a string, it is often easier to use multiline strings. A multiline string in Python begins and ends with either three single quotes or three double quotes. Any quotes, tabs, or newlines in between the “triple quotes” are considered part of the string. Python’s indentation rules for blocks do not apply to lines inside a multiline string.
Open the file editor and write the following:
print('''Dear Alice,
Eve's cat has been arrested for catnapping, cat burglary, and extortion.
Sincerely, Bob''')
Save this program as catnapping.py and run it. The output will look like this:
Dear Alice,
Eve's cat has been arrested for catnapping, cat burglary, and extortion.
Sincerely, Bob
Notice that the single quote character in Eve's does not need to be escaped. Escaping single and double quotes is optional in multiline strings. The following print() call would print identical text but doesn’t use a multiline string:
print('Dear Alice,\n\nEve's cat has been arrested for catnapping, cat burglary, and extortion.\n\nSincerely,\nBob')
Multiline Comments
While the hash character (#) marks the beginning of a comment for the rest of the line, a multiline string is often used for comments that span multiple lines. The following is perfectly valid Python code:
"""This is a test Python program. Written by Al Sweigart al@inventwithpython.com
This program was designed for Python 3, not Python 2. """
def spam(): """This is a multiline comment to help explain what the spam() function does.""" print('Hello!')
Indexing and Slicing Strings
Strings use indexes and slices the same way lists do. You can think of the string 'Hello, world!' as a list and each character in the string as an item with a corresponding index.
' H e l l o , w o r l d ! ' 0 1 2 3 4 5 6 7 8 9 10 11 12
The space and exclamation point are included in the character count, so 'Hello, world!' is 13 characters long, from H at index 0 to ! at index 12.
Enter the following into the interactive shell:
>>> spam = 'Hello, world!' >>> spam[0] 'H' >>> spam[4] 'o' >>> spam[-1] '!' >>> spam[0:5] 'Hello' >>> spam[:5] 'Hello' >>> spam[7:] 'world!'
If you specify an index, you’ll get the character at that position in the string. If you specify a range from one index to another, the starting index is included and the ending index is not. That’s why, if spam is 'Hello, world!', spam[0:5] is 'Hello'. The substring you get from spam[0:5] will include everything from spam[0] to spam[4], leaving out the comma at index 5 and the space at index 6. This is similar to how range(5) will cause a for loop to iterate up to, but not including, 5.
Note that slicing a string does not modify the original string. You can capture a slice from one variable in a separate variable. Try entering the following into the interactive shell:
>>> spam = 'Hello, world!' >>> fizz = spam[0:5] >>> fizz 'Hello'
By slicing and storing the resulting substring in another variable, you can have both the whole string and the substring handy for quick, easy access.
The in and not in Operators with Strings
The in and not in operators can be used with strings just like with list values. An expression with two strings joined using in or not in will evaluate to a Boolean True or False. Enter the following into the interactive shell:
>>> 'Hello' in 'Hello, World' True >>> 'Hello' in 'Hello' True >>> 'HELLO' in 'Hello, World' False >>> '' in 'spam' True >>> 'cats' not in 'cats and dogs' False
These expressions test whether the first string (the exact string, case-sensitive) can be found within the second string.
Putting Strings Inside Other Strings
Putting strings inside other strings is a common operation in programming. So far, we’ve been using the + operator and string concatenation to do this:
>>> name = 'Al' >>> age = 4000 >>> 'Hello, my name is ' + name + '. I am ' + str(age) + ' years old.' 'Hello, my name is Al. I am 4000 years old.'
However, this requires a lot of tedious typing. A simpler approach is to use string interpolation, in which the %s operator inside the string acts as a marker to be replaced by values following the string. One benefit of string interpolation is that str() doesn’t have to be called to convert values to strings. Enter the following into the interactive shell:
>>> name = 'Al' >>> age = 4000 >>> 'My name is %s. I am %s years old.' % (name, age) 'My name is Al. I am 4000 years old.'
Python 3.6 introduced f-strings, which is similar to string interpolation except that braces are used instead of %s, with the expressions placed directly inside the braces. Like raw strings, f-strings have an f prefix before the starting quotation mark. Enter the following into the interactive shell:
>>> name = 'Al' >>> age = 4000 >>> f'My name is {name}. Next year I will be {age + 1}.' 'My name is Al. Next year I will be 4001.'
Remember to include the f prefix; otherwise, the braces and their contents will be a part of the string value:
>>> 'My name is {name}. Next year I will be {age + 1}.' 'My name is {name}. Next year I will be {age + 1}.'
Useful String Methods
Several string methods analyze strings or create transformed string values. This section describes the methods you’ll be using most often.
The upper(), lower(), isupper(), and islower() Methods
The upper() and lower() string methods return a new string where all the letters in the original string have been converted to uppercase or lowercase, respectively. Nonletter characters in the string remain unchanged. Enter the following into the interactive shell:
>>> spam = 'Hello, world!' >>> spam = spam.upper() >>> spam 'HELLO, WORLD!' >>> spam = spam.lower() >>> spam 'hello, world!'
Note that these methods do not change the string itself but return new string values. If you want to change the original string, you have to call upper() or lower() on the string and then assign the new string to the variable where the original was stored. This is why you must use spam = spam.upper() to change the string in spam instead of simply spam.upper(). (This is just like if a variable eggs contains the value 10. Writing eggs + 3 does not change the value of eggs, but eggs = eggs + 3 does.)
The upper() and lower() methods are helpful if you need to make a case-insensitive comparison. For example, the strings 'great' and 'GREat' are not equal to each other. But in the following small program, it does not matter whether the user types Great, GREAT, or grEAT, because the string is first converted to lowercase.
print('How are you?') feeling = input() if feeling.lower() == 'great': print('I feel great too.') else: print('I hope the rest of your day is good.')
When you run this program, the question is displayed, and entering a variation on great, such as GREat, will still give the output I feel great too. Adding code to your program to handle variations or mistakes in user input, such as inconsistent capitalization, will make your programs easier to use and less likely to fail.
How are you? GREat I feel great too.
You can view the execution of this program at https://autbor.com/convertlowercase/. The isupper() and islower() methods will return a Boolean True value if the string has at least one letter and all the letters are uppercase or lowercase, respectively. Otherwise, the method returns False. Enter the following into the interactive shell, and notice what each method call returns:
>>> spam = 'Hello, world!' >>> spam.islower() False >>> spam.isupper() False >>> 'HELLO'.isupper() True >>> 'abc12345'.islower() True >>> '12345'.islower() False >>> '12345'.isupper() False
Since the upper() and lower() string methods themselves return strings, you can call string methods on those returned string values as well. Expressions that do this will look like a chain of method calls. Enter the following into the interactive shell:
>>> 'Hello'.upper() 'HELLO' >>> 'Hello'.upper().lower() 'hello' >>> 'Hello'.upper().lower().upper() 'HELLO' >>> 'HELLO'.lower() 'hello' >>> 'HELLO'.lower().islower() True
The isX() Methods
Along with islower() and isupper(), there are several other string methods that have names beginning with the word is. These methods return a Boolean value that describes the nature of the string. Here are some common isX string methods:
isalpha() Returns True if the string consists only of letters and isn’t blank
isalnum() Returns True if the string consists only of letters and numbers and is not blank
isdecimal() Returns True if the string consists only of numeric characters and is not blank
isspace() Returns True if the string consists only of spaces, tabs, and newlines and is not blank
istitle() Returns True if the string consists only of words that begin with an uppercase letter followed by only lowercase letters
Enter the following into the interactive shell:
>>> 'hello'.isalpha() True >>> 'hello123'.isalpha() False >>> 'hello123'.isalnum() True >>> 'hello'.isalnum() True >>> '123'.isdecimal() True >>> ' '.isspace() True >>> 'This Is Title Case'.istitle() True >>> 'This Is Title Case 123'.istitle() True >>> 'This Is not Title Case'.istitle() False >>> 'This Is NOT Title Case Either'.istitle() False
The isX() string methods are helpful when you need to validate user input. For example, the following program repeatedly asks users for their age and a password until they provide valid input. Open a new file editor window and enter this program, saving it as validateInput.py:
while True: print('Enter your age:') age = input() if age.isdecimal(): break print('Please enter a number for your age.')
while True: print('Select a new password (letters and numbers only):') password = input() if password.isalnum(): break print('Passwords can only have letters and numbers.')
In the first while loop, we ask the user for their age and store their input in age. If age is a valid (decimal) value, we break out of this first while loop and move on to the second, which asks for a password. Otherwise, we inform the user that they need to enter a number and again ask them to enter their age. In the second while loop, we ask for a password, store the user’s input in password, and break out of the loop if the input was alphanumeric. If it wasn’t, we’re not satisfied, so we tell the user the password needs to be alphanumeric and again ask them to enter a password.
When run, the program’s output looks like this:
Enter your age: forty two Please enter a number for your age. Enter your age: 42 Select a new password (letters and numbers only): secr3t! Passwords can only have letters and numbers. Select a new password (letters and numbers only): secr3t
You can view the execution of this program at https://autbor.com/validateinput/. Calling isdecimal() and isalnum() on variables, we’re able to test whether the values stored in those variables are decimal or not, alphanumeric or not. Here, these tests help us reject the input forty two but accept 42, and reject secr3t! but accept secr3t.
The startswith() and endswith() Methods
The startswith() and endswith() methods return True if the string value they are called on begins or ends (respectively) with the string passed to the method; otherwise, they return False. Enter the following into the interactive shell:
>>> 'Hello, world!'.startswith('Hello') True >>> 'Hello, world!'.endswith('world!') True >>> 'abc123'.startswith('abcdef') False >>> 'abc123'.endswith('12') False >>> 'Hello, world!'.startswith('Hello, world!') True >>> 'Hello, world!'.endswith('Hello, world!') True
These methods are useful alternatives to the == equals operator if you need to check only whether the first or last part of the string, rather than the whole thing, is equal to another string.
The join() and split() Methods
The join() method is useful when you have a list of strings that need to be joined together into a single string value. The join() method is called on a string, gets passed a list of strings, and returns a string. The returned string is the concatenation of each string in the passed-in list. For example, enter the following into the interactive shell:
>>> ', '.join(['cats', 'rats', 'bats']) 'cats, rats, bats' >>> ' '.join(['My', 'name', 'is', 'Simon']) 'My name is Simon' >>> 'ABC'.join(['My', 'name', 'is', 'Simon']) 'MyABCnameABCisABCSimon'
Notice that the string join() calls on is inserted between each string of the list argument. For example, when join(['cats', 'rats', 'bats']) is called on the ', ' string, the returned string is 'cats, rats, bats'.
Remember that join() is called on a string value and is passed a list value. (It’s easy to accidentally call it the other way around.) The split() method does the opposite: It’s called on a string value and returns a list of strings. Enter the following into the interactive shell:
>>> 'My name is Simon'.split() ['My', 'name', 'is', 'Simon']
By default, the string 'My name is Simon' is split wherever whitespace characters such as the space, tab, or newline characters are found. These whitespace characters are not included in the strings in the returned list. You can pass a delimiter string to the split() method to specify a different string to split upon. For example, enter the following into the interactive shell:
>>> 'MyABCnameABCisABCSimon'.split('ABC') ['My', 'name', 'is', 'Simon'] >>> 'My name is Simon'.split('m') ['My na', 'e is Si', 'on']
A common use of split() is to split a multiline string along the newline characters. Enter the following into the interactive shell:
>>> spam = '''Dear Alice, How have you been? I am fine. There is a container in the fridge that is labeled "Milk Experiment."
Please do not drink it. Sincerely, Bob''' >>> spam.split('\n') ['Dear Alice,', 'How have you been? I am fine.', 'There is a container in the fridge', 'that is labeled "Milk Experiment."', '', 'Please do not drink it.', 'Sincerely,', 'Bob']
Passing split() the argument '\n' lets us split the multiline string stored in spam along the newlines and return a list in which each item corresponds to one line of the string.
Splitting Strings with the partition() Method
The partition() string method can split a string into the text before and after a separator string. This method searches the string it is called on for the separator string it is passed, and returns a tuple of three substrings for the “before,” “separator,” and “after” substrings. Enter the following into the interactive shell:
>>> 'Hello, world!'.partition('w') ('Hello, ', 'w', 'orld!') >>> 'Hello, world!'.partition('world') ('Hello, ', 'world', '!')
If the separator string you pass to partition() occurs multiple times in the string that partition() calls on, the method splits the string only on the first occurrence:
>>> 'Hello, world!'.partition('o') ('Hell', 'o', ', world!')
If the separator string can’t be found, the first string returned in the tuple will be the entire string, and the other two strings will be empty:
>>> 'Hello, world!'.partition('XYZ') ('Hello, world!', '', '')
You can use the multiple assignment trick to assign the three returned strings to three variables:
>>> before, sep, after = 'Hello, world!'.partition(' ') >>> before 'Hello,' >>> after 'world!'
The partition() method is useful for splitting a string whenever you need the parts before, including, and after a particular separator string.
Justifying Text with the rjust(), ljust(), and center() Methods
The rjust() and ljust() string methods return a padded version of the string they are called on, with spaces inserted to justify the text. The first argument to both methods is an integer length for the justified string. Enter the following into the interactive shell:
>>> 'Hello'.rjust(10) ' Hello' >>> 'Hello'.rjust(20) ' Hello' >>> 'Hello, World'.rjust(20) ' Hello, World' >>> 'Hello'.ljust(10) 'Hello '
'Hello'.rjust(10) says that we want to right-justify 'Hello' in a string of total length 10. 'Hello' is five characters, so five spaces will be added to its left, giving us a string of 10 characters with 'Hello' justified right.
An optional second argument to rjust() and ljust() will specify a fill character other than a space character. Enter the following into the interactive shell:
>>> 'Hello'.rjust(20, '*') '***************Hello' >>> 'Hello'.ljust(20, '-') 'Hello---------------'
The center() string method works like ljust() and rjust() but centers the text rather than justifying it to the left or right. Enter the following into the interactive shell:
>>> 'Hello'.center(20) ' Hello ' >>> 'Hello'.center(20, '=') '=======Hello========'
These methods are especially useful when you need to print tabular data that has correct spacing. Open a new file editor window and enter the following code, saving it as picnicTable.py:
def printPicnic(itemsDict, leftWidth, rightWidth): print('PICNIC ITEMS'.center(leftWidth + rightWidth, '-')) for k, v in itemsDict.items(): print(k.ljust(leftWidth, '.') + str(v).rjust(rightWidth))
picnicItems = {'sandwiches': 4, 'apples': 12, 'cups': 4, 'cookies': 8000} printPicnic(picnicItems, 12, 5) printPicnic(picnicItems, 20, 6)
You can view the execution of this program at https://autbor.com/picnictable/. In this program, we define a printPicnic() method that will take in a dictionary of information and use center(), ljust(), and rjust() to display that information in a neatly aligned table-like format.
The dictionary that we’ll pass to printPicnic() is picnicItems. In picnicItems, we have 4 sandwiches, 12 apples, 4 cups, and 8,000 cookies. We want to organize this information into two columns, with the name of the item on the left and the quantity on the right.
To do this, we decide how wide we want the left and right columns to be. Along with our dictionary, we’ll pass these values to printPicnic().
The printPicnic() function takes in a dictionary, a leftWidth for the left column of a table, and a rightWidth for the right column. It prints a title, PICNIC ITEMS, centered above the table. Then, it loops through the dictionary, printing each key-value pair on a line with the key justified left and padded by periods, and the value justified right and padded by spaces.
After defining printPicnic(), we define the dictionary picnicItems and call printPicnic() twice, passing it different widths for the left and right table columns.
When you run this program, the picnic items are displayed twice. The first time the left column is 12 characters wide, and the right column is 5 characters wide. The second time they are 20 and 6 characters wide, respectively.
---PICNIC ITEMS-- sandwiches.. 4 apples...... 12 cups........ 4 cookies..... 8000 -------PICNIC ITEMS------- sandwiches.......... 4 apples.............. 12 cups................ 4 cookies............. 8000
Using rjust(), ljust(), and center() lets you ensure that strings are neatly aligned, even if you aren’t sure how many characters long your strings are.
Removing Whitespace with the strip(), rstrip(), and lstrip() Methods
Sometimes you may want to strip off whitespace characters (space, tab, and newline) from the left side, right side, or both sides of a string. The strip() string method will return a new string without any whitespace characters at the beginning or end. The lstrip() and rstrip() methods will remove whitespace characters from the left and right ends, respectively. Enter the following into the interactive shell:
>>> spam = ' Hello, World ' >>> spam.strip() 'Hello, World' >>> spam.lstrip() 'Hello, World ' >>> spam.rstrip() ' Hello, World'
Optionally, a string argument will specify which characters on the ends should be stripped. Enter the following into the interactive shell:
>>> spam = 'SpamSpamBaconSpamEggsSpamSpam' >>> spam.strip('ampS') 'BaconSpamEggs'
Passing strip() the argument 'ampS' will tell it to strip occurrences of a, m, p, and capital S from the ends of the string stored in spam. The order of the characters in the string passed to strip() does not matter: strip('ampS') will do the same thing as strip('mapS') or strip('Spam').
Numeric Values of Characters with the ord() and chr() Functions
Computers store information as bytes—strings of binary numbers, which means we need to be able to convert text to numbers. Because of this, every text character has a corresponding numeric value called a Unicode code point. For example, the numeric code point is 65 for 'A', 52 for '4', and 33 for '!'. You can use the ord() function to get the code point of a one-character string, and the chr() function to get the one-character string of an integer code point. Enter the following into the interactive shell:
>>> ord('A') 65 >>> ord('4') 52 >>> ord('!') 33 >>> chr(65) 'A'
These functions are useful when you need to do an ordering or mathematical operation on characters:
>>> ord('B') 66 >>> ord('A') < ord('B') True >>> chr(ord('A')) 'A' >>> chr(ord('A') + 1) 'B'
There is more to Unicode and code points, but those details are beyond the scope of this book. If you’d like to know more, I recommend watching Ned Batchelder’s 2012 PyCon talk, “Pragmatic Unicode, or, How Do I Stop the Pain?” at https://youtu.be/sgHbC6udIqc.
Copying and Pasting Strings with the pyperclip Module
The pyperclip module has copy() and paste() functions that can send text to and receive text from your computer’s clipboard. Sending the output of your program to the clipboard will make it easy to paste it into an email, word processor, or some other software.
RUNNING PYTHON SCRIPTS OUTSIDE OF MU
So far, you’ve been running your Python scripts using the interactive shell and file editor in Mu. However, you won’t want to go through the inconvenience of opening Mu and the Python script each time you want to run a script. Fortunately, there are shortcuts you can set up to make running Python scripts easier. The steps are slightly different for Windows, macOS, and Linux, but each is described in Appendix B. Turn to Appendix B to learn how to run your Python scripts conveniently and be able to pass command line arguments to them. (You will not be able to pass command line arguments to your programs using Mu.)
The pyperclip module does not come with Python. To install it, follow the directions for installing third-party modules in Appendix A. After installing pyperclip, enter the following into the interactive shell:
>>> import pyperclip >>> pyperclip.copy('Hello, world!') >>> pyperclip.paste() 'Hello, world!'
Of course, if something outside of your program changes the clipboard contents, the paste() function will return it. For example, if I copied this sentence to the clipboard and then called paste(), it would look like this:
>>> pyperclip.paste() 'For example, if I copied this sentence to the clipboard and then called paste(), it would look like this:'
Project: Multi-Clipboard Automatic Messages
If you’ve responded to a large number of emails with similar phrasing, you’ve probably had to do a lot of repetitive typing. Maybe you keep a text document with these phrases so you can easily copy and paste them using the clipboard. But your clipboard can only store one message at a time, which isn’t very convenient. Let’s make this process a bit easier with a program that stores multiple phrases.
Step 1: Program Design and Data Structures
You want to be able to run this program with a command line argument that is a short key phrase—for instance, agree or busy. The message associated with that key phrase will be copied to the clipboard so that the user can paste it into an email. This way, the user can have long, detailed messages without having to retype them.
THE CHAPTER PROJECTS
This is the first “chapter project” of the book. From here on, each chapter will have projects that demonstrate the concepts covered in the chapter. The projects are written in a style that takes you from a blank file editor window to a full, working program. Just like with the interactive shell examples, don’t only read the project sections—follow along on your computer!
Open a new file editor window and save the program as mclip.py. You need to start the program with a #! (shebang) line (see Appendix B) and should also write a comment that briefly describes the program. Since you want to associate each piece of text with its key phrase, you can store these as strings in a dictionary. The dictionary will be the data structure that organizes your key phrases and text. Make your program look like the following:
#! python3 # mclip.py - A multi-clipboard program.
TEXT = {'agree': """Yes, I agree. That sounds fine to me.""", 'busy': """Sorry, can we do this later this week or next week?""", 'upsell': """Would you consider making this a monthly donation?"""}
Step 2: Handle Command Line Arguments
The command line arguments will be stored in the variable sys.argv. (See Appendix B for more information on how to use command line arguments in your programs.) The first item in the sys.argv list should always be a string containing the program’s filename ('mclip.py'), and the second item should be the first command line argument. For this program, this argument is the key phrase of the message you want. Since the command line argument is mandatory, you display a usage message to the user if they forget to add it (that is, if the sys.argv list has fewer than two values in it). Make your program look like the following:
#! python3 # mclip.py - A multi-clipboard program.
TEXT = {'agree': """Yes, I agree. That sounds fine to me.""", 'busy': """Sorry, can we do this later this week or next week?""", 'upsell': """Would you consider making this a monthly donation?"""}
import sys if len(sys.argv) < 2: print('Usage: python mclip.py [keyphrase] - copy phrase text') sys.exit()
keyphrase = sys.argv[1] # first command line arg is the keyphrase
Step 3: Copy the Right Phrase
Now that the key phrase is stored as a string in the variable keyphrase, you need to see whether it exists in the TEXT dictionary as a key. If so, you want to copy the key’s value to the clipboard using pyperclip.copy(). (Since you’re using the pyperclip module, you need to import it.) Note that you don’t actually need the keyphrase variable; you could just use sys.argv[1] everywhere keyphrase is used in this program. But a variable named keyphrase is much more readable than something cryptic like sys.argv[1].
Make your program look like the following:
#! python3 # mclip.py - A multi-clipboard program.
TEXT = {'agree': """Yes, I agree. That sounds fine to me.""", 'busy': """Sorry, can we do this later this week or next week?""", 'upsell': """Would you consider making this a monthly donation?"""}
import sys, pyperclip if len(sys.argv) < 2: print('Usage: py mclip.py [keyphrase] - copy phrase text') sys.exit()
keyphrase = sys.argv[1] # first command line arg is the keyphrase
if keyphrase in TEXT: pyperclip.copy(TEXT[keyphrase]) print('Text for ' + keyphrase + ' copied to clipboard.') else: print('There is no text for ' + keyphrase)
This new code looks in the TEXT dictionary for the key phrase. If the key phrase is a key in the dictionary, we get the value corresponding to that key, copy it to the clipboard, and print a message saying that we copied the value. Otherwise, we print a message saying there’s no key phrase with that name.
That’s the complete script. Using the instructions in Appendix B for launching command line programs easily, you now have a fast way to copy messages to the clipboard. You will have to modify the TEXT dictionary value in the source whenever you want to update the program with a new message.
On Windows, you can create a batch file to run this program with the WIN-R Run window. (For more about batch files, see Appendix B.) Enter the following into the file editor and save the file as mclip.bat in the C:\Windows folder:
@py.exe C:\path_to_file\mclip.py %* @pause
With this batch file created, running the multi-clipboard program on Windows is just a matter of pressing WIN-R and typing mclip key phrase.
Project: Adding Bullets to Wiki Markup
When editing a Wikipedia article, you can create a bulleted list by putting each list item on its own line and placing a star in front. But say you have a really large list that you want to add bullet points to. You could just type those stars at the beginning of each line, one by one. Or you could automate this task with a short Python script.
The bulletPointAdder.py script will get the text from the clipboard, add a star and space to the beginning of each line, and then paste this new text to the clipboard. For example, if I copied the following text (for the Wikipedia article “List of Lists of Lists”) to the clipboard:
Lists of animals Lists of aquarium life Lists of biologists by author abbreviation Lists of cultivars
and then ran the bulletPointAdder.py program, the clipboard would then contain the following:
* Lists of animals * Lists of aquarium life * Lists of biologists by author abbreviation * Lists of cultivars
This star-prefixed text is ready to be pasted into a Wikipedia article as a bulleted list.
Step 1: Copy and Paste from the Clipboard
You want the bulletPointAdder.py program to do the following:
Paste text from the clipboard.
Do something to it.
Copy the new text to the clipboard.
That second step is a little tricky, but steps 1 and 3 are pretty straightforward: they just involve the pyperclip.copy() and pyperclip.paste() functions. For now, let’s just write the part of the program that covers steps 1 and 3. Enter the following, saving the program as bulletPointAdder.py:
#! python3 # bulletPointAdder.py - Adds Wikipedia bullet points to the start # of each line of text on the clipboard.
import pyperclip text = pyperclip.paste()
# TODO: Separate lines and add stars.
pyperclip.copy(text)
The TODO comment is a reminder that you should complete this part of the program eventually. The next step is to actually implement that piece of the program.
Step 2: Separate the Lines of Text and Add the Star
The call to pyperclip.paste() returns all the text on the clipboard as one big string. If we used the “List of Lists of Lists” example, the string stored in text would look like this:
'Lists of animals\nLists of aquarium life\nLists of biologists by author abbreviation\nLists of cultivars'
The \n newline characters in this string cause it to be displayed with multiple lines when it is printed or pasted from the clipboard. There are many “lines” in this one string value. You want to add a star to the start of each of these lines.
You could write code that searches for each \n newline character in the string and then adds the star just after that. But it would be easier to use the split() method to return a list of strings, one for each line in the original string, and then add the star to the front of each string in the list.
Make your program look like the following:
#! python3 # bulletPointAdder.py - Adds Wikipedia bullet points to the start # of each line of text on the clipboard.
import pyperclip text = pyperclip.paste()
# Separate lines and add stars. lines = text.split('\n') for i in range(len(lines)): # loop through all indexes in the "lines" list lines[i] = '* ' + lines[i] # add star to each string in "lines" list
pyperclip.copy(text)
We split the text along its newlines to get a list in which each item is one line of the text. We store the list in lines and then loop through the items in lines. For each line, we add a star and a space to the start of the line. Now each string in lines begins with a star.
Step 3: Join the Modified Lines
The lines list now contains modified lines that start with stars. But pyperclip.copy() is expecting a single string value, however, not a list of string values. To make this single string value, pass lines into the join() method to get a single string joined from the list’s strings. Make your program look like the following:
#! python3 # bulletPointAdder.py - Adds Wikipedia bullet points to the start # of each line of text on the clipboard.
import pyperclip text = pyperclip.paste()
# Separate lines and add stars. lines = text.split('\n') for i in range(len(lines)): # loop through all indexes for "lines" list lines[i] = '* ' + lines[i] # add star to each string in "lines" list text = '\n'.join(lines) pyperclip.copy(text)
When this program is run, it replaces the text on the clipboard with text that has stars at the start of each line. Now the program is complete, and you can try running it with text copied to the clipboard.
Even if you don’t need to automate this specific task, you might want to automate some other kind of text manipulation, such as removing trailing spaces from the end of lines or converting text to uppercase or lowercase. Whatever your needs, you can use the clipboard for input and output.
A Short Progam: Pig Latin
Pig Latin is a silly made-up language that alters English words. If a word begins with a vowel, the word yay is added to the end of it. If a word begins with a consonant or consonant cluster (like ch or gr), that consonant or cluster is moved to the end of the word followed by ay.
Let’s write a Pig Latin program that will output something like this:
Enter the English message to translate into Pig Latin: My name is AL SWEIGART and I am 4,000 years old. Ymay amenay isyay ALYAY EIGARTSWAY andyay Iyay amyay 4,000 yearsyay oldyay.
This program works by altering a string using the methods introduced in this chapter. Type the following source code into the file editor, and save the file as pigLat.py:
# English to Pig Latin print('Enter the English message to translate into Pig Latin:') message = input()
VOWELS = ('a', 'e', 'i', 'o', 'u', 'y')
pigLatin = [] # A list of the words in Pig Latin. for word in message.split(): # Separate the non-letters at the start of this word: prefixNonLetters = '' while len(word) > 0 and not word[0].isalpha(): prefixNonLetters += word[0] word = word[1:] if len(word) == 0: pigLatin.append(prefixNonLetters) continue
# Join all the words back together into a single string: print(' '.join(pigLatin))
Let’s look at this code line by line, starting at the top:
# English to Pig Latin print('Enter the English message to translate into Pig Latin:') message = input()
VOWELS = ('a', 'e', 'i', 'o', 'u', 'y')
First, we ask the user to enter the English text to translate into Pig Latin. Also, we create a constant that holds every lowercase vowel letter (and y) as a tuple of strings. This will be used later in our program.
Next, we’re going to create the pigLatin variable to store the words as we translate them into Pig Latin:
pigLatin = [] # A list of the words in Pig Latin. for word in message.split(): # Separate the non-letters at the start of this word: prefixNonLetters = '' while len(word) > 0 and not word[0].isalpha(): prefixNonLetters += word[0] word = word[1:] if len(word) == 0: pigLatin.append(prefixNonLetters) continue
We need each word to be its own string, so we call message.split() to get a list of the words as separate strings. The string 'My name is AL SWEIGART and I am 4,000 years old.' would cause split() to return ['My', 'name', 'is', 'AL', 'SWEIGART', 'and', 'I', 'am', '4,000', 'years', 'old.'].
We need to remove any non-letters from the start and end of each word so that strings like 'old.' translate to 'oldyay.' instead of 'old.yay'. We’ll save these non-letters to a variable named prefixNonLetters.
A loop that calls isalpha() on the first character in the word will determine if we should remove a character from a word and concatenate it to the end of prefixNonLetters. If the entire word is made of non-letter characters, like '4,000', we can simply append it to the pigLatin list and continue to the next word to translate. We also need to save the non-letters at the end of the word string. This code is similar to the previous loop.
Next, we’ll make sure the program remembers if the word was in uppercase or title case so we can restore it after translating the word to Pig Latin:
For the rest of the code in the for loop, we’ll work on a lowercase version of word.
To convert a word like sweigart to eigart-sway, we need to remove all of the consonants from the beginning of word:
We use a loop similar to the loop that removed the non-letters from the start of word, except now we are pulling off consonants and storing them to a variable named prefixConsonants.
If there were any consonants at the start of the word, they are now in prefixConsonants and we should concatenate that variable and the string 'ay' to the end of word. Otherwise, we can assume word begins with a vowel and we only need to concatenate 'yay':
Recall that we set word to its lowercase version with word = word.lower(). If word was originally in uppercase or title case, this code will convert word back to its original case:
At the end of the for loop, we append the word, along with any non-letter prefix or suffix it originally had, to the pigLatin list:
# Join all the words back together into a single string: print(' '.join(pigLatin))
After this loop finishes, we combine the list of strings into a single string by calling the join() method. This single string is passed to print() to display our Pig Latin on the screen.
You can find other short, text-based Python programs like this one at https://github.com/asweigart/pythonstdiogames/.
Summary
Text is a common form of data, and Python comes with many helpful string methods to process the text stored in string values. You will make use of indexing, slicing, and string methods in almost every Python program you write.
The programs you are writing now don’t seem too sophisticated—they don’t have graphical user interfaces with images and colorful text. So far, you’re displaying text with print() and letting the user enter text with input(). However, the user can quickly enter large amounts of text through the clipboard. This ability provides a useful avenue for writing programs that manipulate massive amounts of text. These text-based programs might not have flashy windows or graphics, but they can get a lot of useful work done quickly.
Another way to manipulate large amounts of text is reading and writing files directly off the hard drive. You’ll learn how to do this with Python in Chapter 9.
That just about covers all the basic concepts of Python programming! You’ll continue to learn new concepts throughout the rest of this book, but you now know enough to start writing some useful programs that can automate tasks. If you’d like to see a collection of short, simple Python programs built from the basic concepts you’ve learned so far, check out https://github.com/asweigart/pythonstdiogames/. Try copying the source code for each program by hand, and then make modifications to see how they affect the behavior of the program. Once you have an understanding of how the program works, try re-creating the program yourself from scratch. You don’t need to re-create the source code exactly; just focus on what the program does rather than how it does it.
You might not think you have enough Python knowledge to do things such as download web pages, update spreadsheets, or send text messages, but that’s where Python modules come in! These modules, written by other programmers, provide functions that make it easy for you to do all these things. So let’s learn how to write real programs to do useful automated tasks.
Practice Questions
1. What are escape characters?
2. What do the \n and \t escape characters represent?
3. How can you put a \ backslash character in a string?
4. The string value "Howl's Moving Castle" is a valid string. Why isn’t it a problem that the single quote character in the word Howl's isn’t escaped?
5. If you don’t want to put \n in your string, how can you write a string with newlines in it?
6. What do the following expressions evaluate to?
'Hello, world!'[1]
'Hello, world!'[0:5]
'Hello, world!'[:5]
'Hello, world!'[3:]
7. What do the following expressions evaluate to?
'Hello'.upper()
'Hello'.upper().isupper()
'Hello'.upper().lower()
8. What do the following expressions evaluate to?
'Remember, remember, the fifth of November.'.split()
'-'.join('There can be only one.'.split())
9. What string methods can you use to right-justify, left-justify, and center a string?
10. How can you trim whitespace characters from the beginning or end of a string?
Practice Projects
For practice, write programs that do the following.
Table Printer
Write a function named printTable() that takes a list of lists of strings and displays it in a well-organized table with each column right-justified. Assume that all the inner lists will contain the same number of strings. For example, the value could look like this:
tableData = [['apples', 'oranges', 'cherries', 'banana'], ['Alice', 'Bob', 'Carol', 'David'], ['dogs', 'cats', 'moose', 'goose']]
Your printTable() function would print the following:
apples Alice dogs oranges Bob cats cherries Carol moose banana David goose
Hint: your code will first have to find the longest string in each of the inner lists so that the whole column can be wide enough to fit all the strings. You can store the maximum width of each column as a list of integers. The printTable() function can begin with colWidths = [0] * len(tableData), which will create a list containing the same number of 0 values as the number of inner lists in tableData. That way, colWidths[0] can store the width of the longest string in tableData[0], colWidths[1] can store the width of the longest string in tableData[1], and so on. You can then find the largest value in the colWidths list to find out what integer width to pass to the rjust() string method.
Zombie Dice Bots
Programming games are a game genre where instead of playing a game directly, players write bot programs to play the game autonomously. I’ve created a Zombie Dice simulator, which allows programmers to practice their skills while making game-playing AIs. Zombie Dice bots can be simple or incredibly complex, and are great for a class exercise or an individual programming challenge.
Zombie Dice is a quick, fun dice game from Steve Jackson Games. The players are zombies trying to eat as many human brains as possible without getting shot three times. There is a cup of 13 dice with brains, footsteps, and shotgun icons on their faces. The dice icons are colored, and each color has a different likelihood of each event occurring. Every die has two sides with footsteps, but dice with green icons have more sides with brains, red-icon dice have more shotguns, and yellow-icon dice have an even split of brains and shotguns. Do the following on each player’s turn:
Place all 13 dice in the cup. The player randomly draws three dice from the cup and then rolls them. Players always roll exactly three dice.
They set aside and count up any brains (humans whose brains were eaten) and shotguns (humans who fought back). Accumulating three shotguns automatically ends a player’s turn with zero points (regardless of how many brains they had). If they have between zero and two shotguns, they may continue rolling if they want. They may also choose to end their turn and collect one point per brain.
If the player decides to keep rolling, they must reroll all dice with footsteps. Remember that the player must always roll three dice; they must draw more dice out of the cup if they have fewer than three footsteps to roll. A player may keep rolling dice until either they get three shotguns—losing everything—or all 13 dice have been rolled. A player may not reroll only one or two dice, and may not stop mid-reroll.
When someone reaches 13 brains, the rest of the players finish out the round. The person with the most brains wins. If there’s a tie, the tied players play one last tiebreaker round.
Zombie Dice has a push-your-luck game mechanic: the more you reroll the dice, the more brains you can get, but the more likely you’ll eventually accrue three shotguns and lose everything. Once a player reaches 13 points, the rest of the players get one more turn (to potentially catch up) and the game ends. The player with the most points wins. You can find the complete rules at https://github.com/asweigart/zombiedice/.
Install the zombiedice module with pip by following the instructions in Appendix A. You can run a demo of the simulator with some pre-made bots by running the following in the interactive shell:
>>> import zombiedice >>> zombiedice.demo() Zombie Dice Visualization is running. Open your browser to http:// localhost:51810 to view it. Press Ctrl-C to quit.
The program launches your web browser, which will look like Figure 6-1.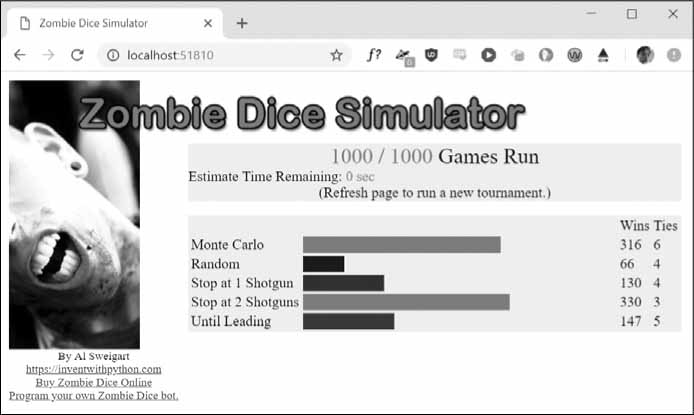
Figure 6-1: The web GUI for the Zombie Dice simulator
You’ll create bots by writing a class with a turn() method, which is called by the simulator when it’s your bot’s turn to roll the dice. Classes are beyond the scope of this book, so the class code is already set up for you in the myzombie.py program, which is in the downloadable ZIP file for this book at https://nostarch.com/automatestuff2/. Writing a method is essentially the same as writing a function, and you can use the turn() code in the myZombie.py program as a template. Inside this turn() method, you’ll call the zombiedice.roll() function as often as you want your bot to roll the dice.
import zombiedice
class MyZombie: def __init__(self, name): # All zombies must have a name: self.name = name
zombies = ( zombiedice.examples.RandomCoinFlipZombie(name='Random'), zombiedice.examples.RollsUntilInTheLeadZombie(name='Until Leading'), zombiedice.examples.MinNumShotgunsThenStopsZombie(name='Stop at 2 Shotguns', minShotguns=2), zombiedice.examples.MinNumShotgunsThenStopsZombie(name='Stop at 1 Shotgun', minShotguns=1), MyZombie(name='My Zombie Bot'), # Add any other zombie players here. )
# Uncomment one of the following lines to run in CLI or Web GUI mode: #zombiedice.runTournament(zombies=zombies, numGames=1000) zombiedice.runWebGui(zombies=zombies, numGames=1000)
The turn() method takes two parameters: self and gameState. You can ignore these in your first few zombie bots and consult the online documentation for details later if you want to learn more. The turn() method should call zombiedice.roll() at least once for the initial roll. Then, depending on the strategy the bot uses, it can call zombiedice.roll() again as many times as it wants. In myZombie.py, the turn() method calls zombiedice.roll() twice, which means the zombie bot will always roll its dice two times per turn regardless of the results of the roll.
The return value of zombiedice.roll() tells your code the results of the dice roll. It is a dictionary with four keys. Three of the keys, 'shotgun', 'brains', and 'footsteps', have integer values of how many dice came up with those icons. The fourth 'rolls' key has a value that is a list of tuples for each die roll. The tuples contain two strings: the color of the die at index 0 and the icon rolled at index 1. Look at the code comments in the turn() method’s definition for an example. If the bot has already rolled three shotguns, then zombiedice.roll() will return None.
Try writing some of your own bots to play Zombie Dice and see how they compare against the other bots. Specifically, try to create the following bots:
A bot that, after the first roll, randomly decides if it will continue or stop
A bot that stops rolling after it has rolled two brains
A bot that stops rolling after it has rolled two shotguns
A bot that initially decides it’ll roll the dice one to four times, but will stop early if it rolls two shotguns
A bot that stops rolling after it has rolled more shotguns than brains
Run these bots through the simulator and see how they compare to each other. You can also examine the code of some premade bots at https://github.com/asweigart/zombiedice/. If you find yourself playing this game in the real world, you’ll have the benefit of thousands of simulated games telling you that one of the best strategies is to simply stop once you’ve rolled two shotguns. But you could always try pressing your luck . . .
Last updated