> For the complete documentation index, see [llms.txt](https://bryan-guner.gitbook.io/my-docs/llms.txt). Markdown versions of documentation pages are available by appending `.md` to page URLs; this page is available as [Markdown](https://bryan-guner.gitbook.io/my-docs/web_dev_tools/postman.md).
# Postman
## Introduction
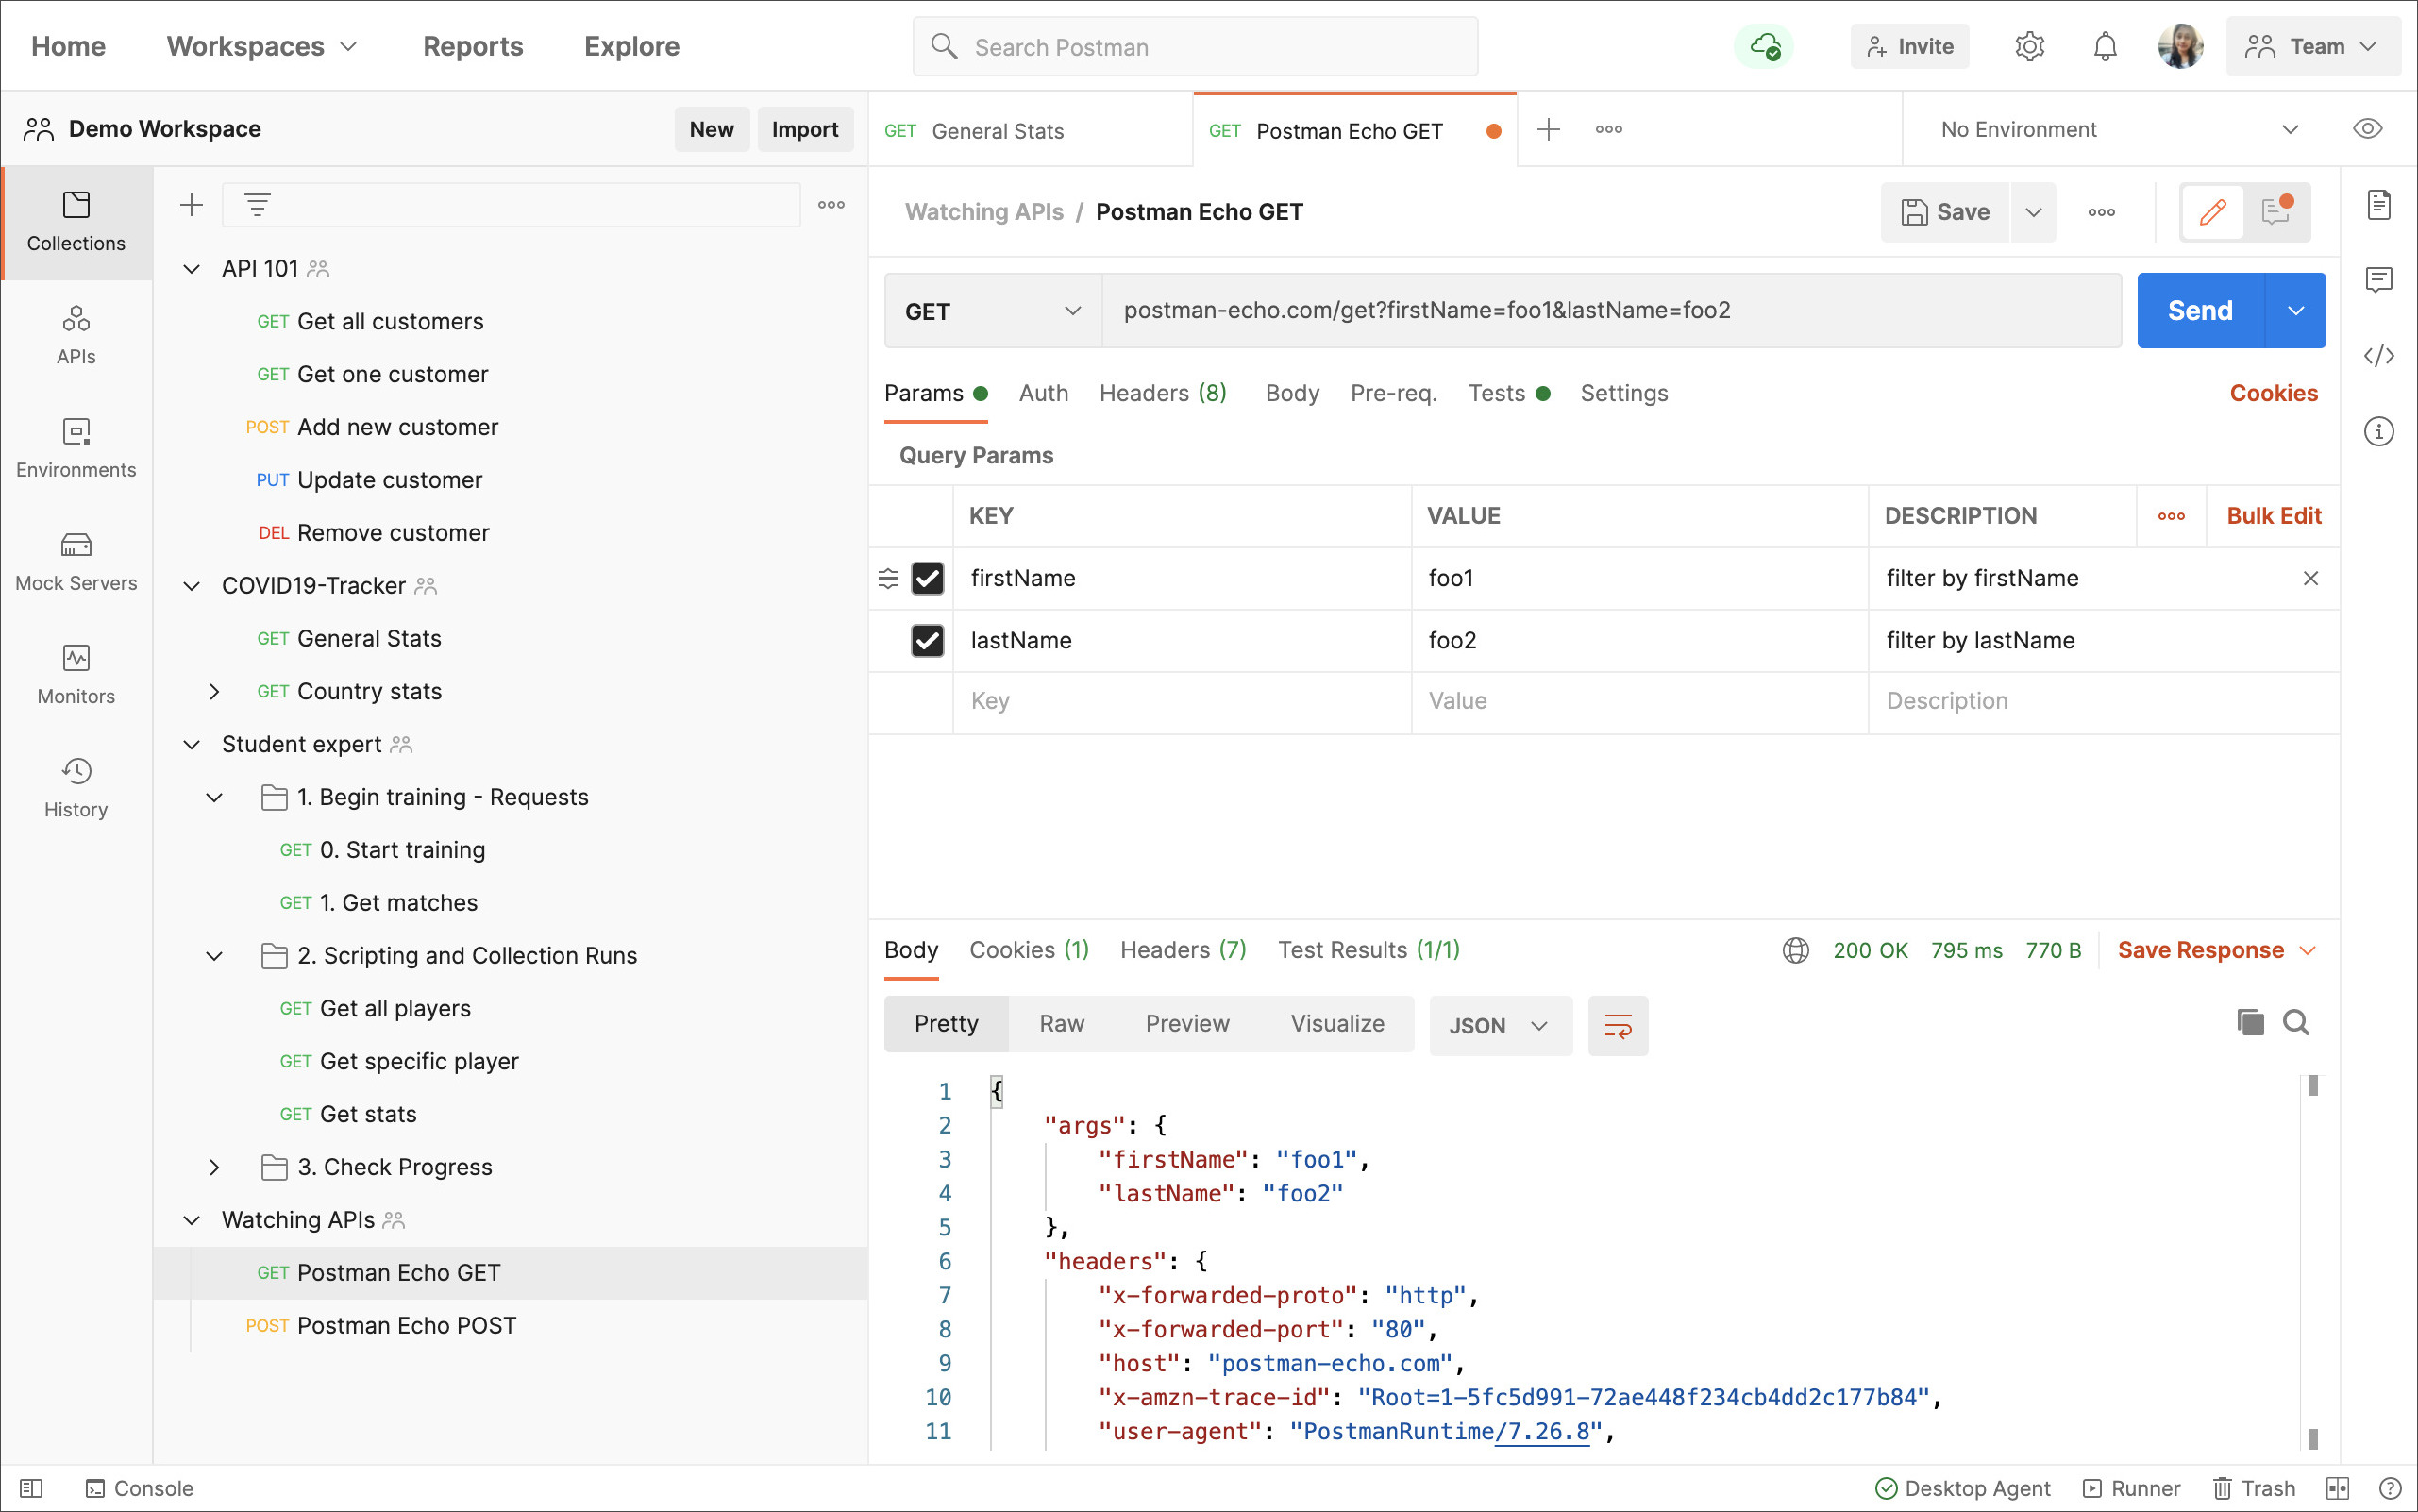
Welcome to the Postman docs! This is the place to find official information on how to use Postman in your API projects.
[](https://assets.postman.com/postman-docs/postman-app-default-v8.jpg)
If you're just starting to learn about APIs and Postman, you can use a variety of channels both in and outside Postman:
* [**Send your first request!**](https://learning.postman.com/docs/getting-started/sending-the-first-request/)
* Use the **Bootcamp** to work through lessons inside Postman—open it at the bottom right of the app.
* Explore [workspaces, collections, and more](https://www.postman.com/explore) that you can try out inside Postman, like the following:
* [**Learn by API**](https://www.postman.com/postman/workspace/published-postman-templates/collection/9065401-ff29b3be-af69-4442-91e0-c1158b620fc2?ctx=documentation)–walk through beginner API concepts.
* [**Postman Training**](https://www.postman.com/postman/workspace/postman-galaxy-training/overview)–Learn APIs 101, Testing and Automation, API Adoption, and API First, earning [Postman badges](https://badgr.com/public/issuers/BC0x4AQaQPC7lFilsBP_tQ/badges).
* [**Student Program**](https://www.postman.com/postman/workspace/postman-student-program/overview)–Take the Student Expert training, covering request configurations and test scripting.
### What are you here to learn about?
If you're learning to carry out a specific task or workflow in Postman, check out the following topics to find resources:
* [**Making requests**](https://learning.postman.com/docs/getting-started/introduction/#making-requests)
* [**Testing APIs**](https://learning.postman.com/docs/getting-started/introduction/#testing-apis)
* [**Building and managing APIs**](https://learning.postman.com/docs/getting-started/introduction/#building-and-managing-apis)
* [**Publishing APIs**](https://learning.postman.com/docs/getting-started/introduction/#publishing-apis)
* [**Collaborating with your team**](https://learning.postman.com/docs/getting-started/introduction/#collaborating-with-your-team)
* [**Developing with Postman**](https://learning.postman.com/docs/getting-started/introduction/#developing-with-postman)
#### Making requests
If you're building a client app or just need to connect to an API, check out some Postman essentials:
* [Connecting to APIs](https://learning.postman.com/docs/sending-requests/requests/)
* [Authorizing requests](https://learning.postman.com/docs/sending-requests/authorization/)
* [Grouping requests in collections](https://learning.postman.com/docs/sending-requests/intro-to-collections/)
* [Using variables](https://learning.postman.com/docs/sending-requests/variables/)
* [Visualizing data](https://learning.postman.com/docs/sending-requests/visualizer/)
#### Testing APIs
If you're testing an API, you can use Postman to automate various parts of the process:
* [Writing test scripts](https://learning.postman.com/docs/writing-scripts/test-scripts/)
* [Automating workflows with the collection runner](https://learning.postman.com/docs/running-collections/intro-to-collection-runs/)
* [Capturing HTTP requests](https://learning.postman.com/docs/sending-requests/capturing-request-data/capturing-http-requests/)
* [Test script examples](https://learning.postman.com/docs/writing-scripts/script-references/test-examples/)
#### Building and managing APIs
If you're developing a back-end, working API-first, or need to monitor API performance, Postman utilities can streamline your workflows:
* [Defining an API from a schema](https://learning.postman.com/docs/designing-and-developing-your-api/the-api-workflow/)
* [Monitoring test runs](https://learning.postman.com/docs/designing-and-developing-your-api/monitoring-your-api/intro-monitors/)
* [Analyzing API performance](https://learning.postman.com/docs/designing-and-developing-your-api/view-and-analyze-api-reports/)
* [Mocking responses](https://learning.postman.com/docs/designing-and-developing-your-api/mocking-data/setting-up-mock/)
#### Publishing APIs
If you're exposing an API for public use, Postman can support developer onboarding:
* [Publishing documentation](https://learning.postman.com/docs/publishing-your-api/documenting-your-api/)
* [Using Run in Postman](https://learning.postman.com/docs/publishing-your-api/run-in-postman/introduction-run-button/)
#### Collaborating with your team
If you're using Postman in your company or team, check out these guides to maximize your collaboration:
* [Collaborating in Postman](https://learning.postman.com/docs/collaborating-in-postman/collaboration-intro/)
* [Creating workspaces](https://learning.postman.com/docs/collaborating-in-postman/using-workspaces/creating-workspaces/)
* [Managing Postman for an organization](https://learning.postman.com/docs/administration/managing-your-team/managing-your-team/)
* [Onboarding your team](https://learning.postman.com/docs/administration/onboarding-checklist/)
#### Developing with Postman
If you're integrating Postman with your CI/CD workflow or are developing with Postman APIs or libraries, check out these resources:
* [Integrating with a development pipeline](https://learning.postman.com/docs/running-collections/using-newman-cli/command-line-integration-with-newman/)
* [Developing with Postman utilities](https://learning.postman.com/docs/developer/resources-intro/)
* [Postman API](https://learning.postman.com/docs/developer/intro-api/)
### Providing feedback
Share your thoughts on the documentation and help the Postman team to improve it for yourself and other learners! To submit feedback, please [create an issue on the documentation GitHub repo](https://github.com/postmanlabs/postman-docs/issues) or post in the [community forum](https://community.postman.com).
Help improve Postman and have an impact on [Postman's roadmap](https://github.com/postmanlabs/postman-app-support/projects/45?fullscreen=true) by sending your feedback directly to Postman's developer team. To submit feature requests, [create an issue on the Postman GitHub repo](https://github.com/postmanlabs/postman-app-support/issues).
\
To get the latest version of the Postman desktop app, visit the [download page](https://www.postman.com/downloads/) and select **Download** for your platform.
### Contents
* Installing Postman on the desktop
* [Mac](https://github.com/postmanlabs/postman-docs/blob/develop/src/pages/docs/getting-started/installation-and-updates.md#installing-postman-on-mac)
* [Windows](https://github.com/postmanlabs/postman-docs/blob/develop/src/pages/docs/getting-started/installation-and-updates.md#installing-postman-on-windows)
* [Linux](https://github.com/postmanlabs/postman-docs/blob/develop/src/pages/docs/getting-started/installation-and-updates.md#installing-postman-on-linux)
* [Using Postman on the web](https://github.com/postmanlabs/postman-docs/blob/develop/src/pages/docs/getting-started/installation-and-updates.md#using-postman-on-the-web)
* [Browser requirements](https://github.com/postmanlabs/postman-docs/blob/develop/src/pages/docs/getting-started/installation-and-updates.md#browser-requirements)
* [Installing the Postman desktop agent](https://github.com/postmanlabs/postman-docs/blob/develop/src/pages/docs/getting-started/installation-and-updates.md#installing-the-postman-desktop-agent)
* [Web limitations](https://github.com/postmanlabs/postman-docs/blob/develop/src/pages/docs/getting-started/installation-and-updates.md#web-limitations)
* [Updating Postman](https://github.com/postmanlabs/postman-docs/blob/develop/src/pages/docs/getting-started/installation-and-updates.md#updating-postman)
* [Chrome app (deprecated)](https://github.com/postmanlabs/postman-docs/blob/develop/src/pages/docs/getting-started/installation-and-updates.md#postman-chrome-app-deprecated)
* [Migrating to the native app](https://github.com/postmanlabs/postman-docs/blob/develop/src/pages/docs/getting-started/installation-and-updates.md#migrating-to-the-native-app)
* [Using Postman behind a firewall](https://github.com/postmanlabs/postman-docs/blob/develop/src/pages/docs/getting-started/installation-and-updates.md#using-postman-behind-a-firewall)
* [Troubleshooting your Postman installation](https://github.com/postmanlabs/postman-docs/blob/develop/src/pages/docs/getting-started/installation-and-updates.md#troubleshooting-your-postman-installation)
* [Next steps](https://github.com/postmanlabs/postman-docs/blob/develop/src/pages/docs/getting-started/installation-and-updates.md#next-steps)
> Note that the Postman team only tests, fixes bugs, and provides support for the app on Mac, Windows, Linux, and the web.
### Installing Postman on Mac
[Download](https://www.postman.com/downloads/) and unzip the app *using the built-in Archive Utility app*. Double-click **Postman**. When prompted, move the file to your **Applications** folder—this will ensure that future updates can be installed correctly.
> The minimum OS version supported is macOS 10.11 (El Capitan).
>
> You may encounter a "Library not loaded" error if you attempt to unzip and install Postman using a third-party app—using the default Archive Utility for Mac should resolve this.
### Installing Postman on Windows
[Download](https://www.postman.com/downloads/) the app. Double-click the `exe` file to install it.
> Postman supports Windows 7 and above. Both `ia32 (x86)` and `x64 (amd64)` installers are available for Windows. Windows for ARM devices is possible by using the ia32 binary.
### Installing Postman on Linux
You can install Postman on Linux by manually downloading it, using the [Snap](https://snapcraft.io/postman) store link, or with the command `snap install postman`.
To install manually, [download](https://www.postman.com/downloads/) and unzip the app, for example into the `opt` directory. You will need `sudo` privileges.
To start the app from a launcher icon, create a desktop file, naming it `Postman.desktop` and saving it in the following location:
```
~/.local/share/applications/Postman.desktop
```
Enter the following content in the file—replacing `opt` if you extracted the file somewhere else—and save it:
```
[Desktop Entry]
Encoding=UTF-8
Name=Postman
Exec=/opt/Postman/app/Postman %U
Icon=/opt/Postman/app/resources/app/assets/icon.png
Terminal=false
Type=Application
Categories=Development;
```
> Postman supports the following distributions:
>
> * Ubuntu 14.04 and newer
> * Fedora 24
> * Debian 8 and newer
>
> The support of certain Linux distributions depends on if they are supported by Electron. Refer to [Electron's documentation](https://www.electronjs.org/docs/tutorial/support#linux).
>
> It is recommended you install [Snap](https://snapcraft.io/postman) as it includes all the libraries that the app needs and they are bundled with the app itself.
>
> Avoid starting Postman using the `sudo` command, as it will create permission issues on the files created by Postman.
>
> Make sure you have read/write permission for the `~/.config` folder where Postman stores information.
>
> If you are an Ubuntu 18 user, you will also need to install the `libgconf-2-4` package with the command `apt-get install libgconf-2-4`
### Using Postman on the web
You can use Postman in your web browser to carry out your API development and testing tasks in conjunction with the Postman Agent. To access Postman on the web, visit [go.postman.co/home](https://go.postman.co/home).
#### Browser requirements
Postman’s web application is optimized for the following browsers:
* Chrome (78 and higher)
* Firefox (76 and higher)
* Edge (79 and higher)
* Safari (13.1.1 and higher)
#### Installing the Postman desktop agent
If you are using the Postman web client, you will need to also download the Postman desktop agent. You will be prompted to download and install the agent so that you can make requests from the web. You can also download the agent directly from [the Downloads page](https://www.postman.com/downloads/).
[](https://camo.githubusercontent.com/2fc0384c7b91aacf1f2497f1fa70cc024bf8f19b0a12652a990bb1d8739780e4/68747470733a2f2f6173736574732e706f73746d616e2e636f6d2f706f73746d616e2d646f63732f646f776e6c6f61642d6167656e742d7638362e6a7067)
The Postman agent overcomes the Cross Object Resource Sharing (CORS) limitations of browsers, and facilitates API request sending from your browser version of Postman. Once you have the agent installed you will be able to use it with web requests.
You can either enable **Auto-select** option or manually select the agent (**Cloud**, **Desktop**, or **Browser**) you would like to use for your requests.
[](https://camo.githubusercontent.com/8b042765d4eb6d7d9f6de43c12978f27c00111025ecfcdcd6059181b7a69c1bc/68747470733a2f2f6173736574732e706f73746d616e2e636f6d2f706f73746d616e2d646f63732f73656c6563742d6167656e742d666f722d72657175657374732e676966)
Once you enable the option for **Auto-select**, Postman will automatically select the best agent for your requests.
You can select the **Cloud Agent** if you want to send HTTP requests via Postman's secure cloud servers. While using the locally running Postman, it is recommended you use the **Desktop Agent**. Using the **Browser Agent** for your web requests has some [limitations](https://github.com/postmanlabs/postman-docs/blob/develop/docs/getting-started/installation-and-updates/#web-limitations).
> If you try to send a request and it isn't successful because the agent is not selected, you will see a link in the response area which you can select to switch to the agent and try your request again. Read [more about the agent](https://blog.postman.com/introducing-the-postman-agent-send-api-requests-from-your-browser-without-limits/).
#### Web limitations
Postman on the web is under active development, but there are a few features you can currently only access in the desktop app and not in your web browser:
* **Live preview**: You will not see all of your request headers update live as you enter your request configurations as you do in the desktop Postman app—you will only see Authorization headers update as you edit.
* **Saving responses to file**
* **Certificates and Proxy**: These will take the browser defined value and cannot be overridden by Postman.
* **Postman Interceptor**
### Updating Postman
The native Postman apps will notify you when a major update is available. For other updates you will see a dot on the settings icon. If the indicator is red instead of orange, it indicates a failed update.
[](https://camo.githubusercontent.com/0dfa85a0de853542ed3bd9239eef91b86e234d721618847a7ff42c878afb73c4/68747470733a2f2f6173736574732e706f73746d616e2e636f6d2f706f73746d616e2d646f63732f7570646174652d72656164792d7638362e6a7067)
Select the update option to download or install the latest update. You will see a notification when the download is complete, prompting you to restart the Postman app to apply the updates. If you're not ready to update yet, choose **Later** to auto-update the next time you launch the app.
You can configure your preferences to enable automatic download for major updates in **Settings** > **Update**. Postman automatically downloads minor updates and bug fixes.
[](https://camo.githubusercontent.com/e3807575d8cc4f0288d36ec2d226530b07ff0509cb07d767d9f6054f00d67356/68747470733a2f2f6173736574732e706f73746d616e2e636f6d2f706f73746d616e2d646f63732f73657474696e67732d757064617465732d7638362e6a7067)
### Postman Chrome app (deprecated)
The Postman Chrome app is deprecated—if you're using the Chrome app, you can [retain your data when you switch to the native app](https://github.com/postmanlabs/postman-docs/blob/develop/src/pages/docs/getting-started/installation-and-updates.md#migrating-to-the-native-app) either by syncing with a Postman account you're signed into, or by exporting from Chrome and importing into the native app.
The native app is built on [Electron](https://www.electronjs.org), and [overcomes a number of restrictions](https://blog.postman.com/going-native/) of the Chrome platform.
* The native apps let you work with [cookies](https://github.com/postmanlabs/postman-docs/blob/develop/docs/sending-requests/cookies) directly.
* Unlike the Chrome app, no separate extension for the [Interceptor](https://github.com/postmanlabs/postman-docs/blob/develop/docs/sending-requests/capturing-request-data/interceptor) is needed.
* The native apps come with a built-in proxy that you can use to [capture network traffic](https://github.com/postmanlabs/postman-docs/blob/develop/docs/sending-requests/capturing-request-data/capturing-http-requests).
* The native apps are not restricted by the Chrome standards for the menu bar. You can check for updates, create Postman Windows and tabs, and edit preferences.
* The native apps let you send headers like `Origin` and `User-Agent`. These are restricted in the Chrome app.
* The "don't follow redirects" option exists in the native apps to prevent requests that return a 300-series response from being automatically redirected—doing this in the Chrome app requires the Interceptor extension.
* The native app has a built-in [console](https://github.com/postmanlabs/postman-docs/blob/develop/docs/sending-requests/troubleshooting-api-requests), which allows you to view the network request details for API calls.
#### Migrating to the native app
To switch from the Chrome app to native, [download](https://www.postman.com/downloads/) Postman and [sign in to your account](https://go.postman.co). Start the native app, and your history and collections will be automatically synced.
Alternatively, if you don't want to sign in to your Postman account, you can bulk export your Postman data from the Chrome app, and then bulk import into the new native app at **Settings** > **Data**.

> Note that importing will overwrite your existing data. For more on bulk import, see [Importing Postman data](https://github.com/postmanlabs/postman-docs/blob/develop/docs/getting-started/importing-and-exporting-data).
### Using Postman behind a firewall
Postman's infrastructure runs on Amazon's AWS platform. If you are operating behind a network firewall, you will need to allow the following domains to make WebSocket connections for Postman:
* `\*.getpostman.com`
* `\*.postman.co`
* `\*.pstmn.io`
* `\*postman.com`
By default, WebSocket connections use the same ports as HTTP (80) and HTTPS (443).
Postman does not have a fixed IP range that can be provided. If necessary, please refer to the [current AWS IP ranges](https://docs.aws.amazon.com/general/latest/gr/aws-ip-ranges.html) and allow the broad range provided.
### Troubleshooting your Postman installation
If you encounter any issues installing and running Postman, check out the following tips. If these do not help, please refer to the installation posts on the [community forum](https://community.postman.com/tags/installation) and create a new post if your issue is not already covered.
#### Update failed error
If you see an **Update Failed** notification in Postman, you can use the DevTools to investigate.

Open the DevTools using **View** > **Developer** > **Show DevTools (Current View)**. Some known errors are as follows:
* **Error message:** `Cannot update while running on a read-only volume`
* This error means that the app user does not have write permission in the directory where Postman is installed. To resolve the problem, move Postman to a directory where the user has write permissions, for example the `/Application` directory for Mac, and to the `home` directory for Linux.

* **Error message:** `Code signature at URL file:///... did not pass validation: code object is not signed at all`
* This error means that there are multiple updates running at the same time. This can happen when the app is opened before the previous update could finish. To resolve the problem, quit and reopen the app.
[](https://camo.githubusercontent.com/c5e998ba8d4ab426b6beb383a06c11e362701b841e0ec649c1aec7b8c3092c51/68747470733a2f2f6173736574732e706f73746d616e2e636f6d2f706f73746d616e2d646f63732f6d756c7469706c652d757064617465732d72756e6e696e672e706e67)
#### Update button not available
If you are using Postman for Linux, and installed the app with the Ubuntu Software Center or Snap Store, you may not see a **Check for updates** button. This is because the updates are handled by the store, which should automatically update Postman on a regular cadence.
### Next steps
If you're having trouble with installation or updates, reach out for [Postman support](https://www.postman.com/support). If your installation is working as expected, [send your first request](https://github.com/postmanlabs/postman-docs/blob/develop/docs/getting-started/sending-the-first-request)!
## Postman JavaScript reference
Postman provides JavaScript APIs that you can use in your request scripts. The `pm` object provides most of the functionality for testing your request and response data, with the `postman` object providing some additional workflow control.
### Contents
* [The pm object](https://learning.postman.com/docs/writing-scripts/script-references/postman-sandbox-api-reference/#the-pm-object)
* [Using variables in scripts](https://learning.postman.com/docs/writing-scripts/script-references/postman-sandbox-api-reference/#using-variables-in-scripts)
* [Environment variables](https://learning.postman.com/docs/writing-scripts/script-references/postman-sandbox-api-reference/#using-environment-variables-in-scripts)
* [Collection variables](https://learning.postman.com/docs/writing-scripts/script-references/postman-sandbox-api-reference/#using-collection-variables-in-scripts)
* [Global variables](https://learning.postman.com/docs/writing-scripts/script-references/postman-sandbox-api-reference/#using-global-variables-in-scripts)
* [Data variables](https://learning.postman.com/docs/writing-scripts/script-references/postman-sandbox-api-reference/#using-data-variables-in-scripts)
* [Scripting with request and response data](https://learning.postman.com/docs/writing-scripts/script-references/postman-sandbox-api-reference/#scripting-with-request-and-response-data)
* [Request data](https://learning.postman.com/docs/writing-scripts/script-references/postman-sandbox-api-reference/#scripting-with-request-data)
* [Response data](https://learning.postman.com/docs/writing-scripts/script-references/postman-sandbox-api-reference/#scripting-with-response-data)
* [Request info](https://learning.postman.com/docs/writing-scripts/script-references/postman-sandbox-api-reference/#scripting-with-request-info)
* [Cookies](https://learning.postman.com/docs/writing-scripts/script-references/postman-sandbox-api-reference/#scripting-with-request-cookies)
* [Sending requests from scripts](https://learning.postman.com/docs/writing-scripts/script-references/postman-sandbox-api-reference/#sending-requests-from-scripts)
* [Scripting workflows](https://learning.postman.com/docs/writing-scripts/script-references/postman-sandbox-api-reference/#scripting-workflows)
* [Scripting visualizations](https://learning.postman.com/docs/writing-scripts/script-references/postman-sandbox-api-reference/#scripting-visualizations)
* [Building response data into visualizations](https://learning.postman.com/docs/writing-scripts/script-references/postman-sandbox-api-reference/#building-response-data-into-visualizations)
* [Writing test assertions](https://learning.postman.com/docs/writing-scripts/script-references/postman-sandbox-api-reference/#writing-test-assertions)
* [Using external libraries](https://learning.postman.com/docs/writing-scripts/script-references/postman-sandbox-api-reference/#using-external-libraries)
### The pm object
You will carry out most of the Postman JavaScript API functionality using `pm.*`, which provides access to request and response data, and variables.
#### Using variables in scripts
You can access and manipulate [variables](https://learning.postman.com/docs/sending-requests/variables/) at each scope in Postman using the `pm` API.
> You can use [dynamic variables](https://learning.postman.com/docs/writing-scripts/script-references/variables-list/) to generate values when your requests run.
Postman supports a variety of variable [scopes](https://learning.postman.com/docs/sending-requests/variables/#variable-scopes). The `pm` object provides methods for accessing global, collection, and environment variables specifically, and `pm.variables` methods for accessing variables at different scopes as well as setting local variables.
* Check if there is a Postman variable in the current scope:
```
pm.variables.has(variableName:String):function → Boolean
```
* Get the value of the Postman variable with the specified name:
```
pm.variables.get(variableName:String):function → *
```
* Set a local variable with the specified name and value:
```
pm.variables.set(variableName:String, variableValue:*):function
```
* Return the resolved value of a dynamic variable inside a script using the syntax `{{$variableName}}`:
```
pm.variables.replaceIn(variableName:String):function: → *
```
> For example:
```
const stringWithVars = pm.variables.replaceIn("Hi, my name is {{$randomFirstName}}");
console.log(stringWithVars);
```
* Return an object containing all variables with their values in the current scope. Based on the order of precedence, this will contain variables from multiple scopes.
```
pm.variables.toObject():function → Object
```
Variable scope determines the precedence Postman gives to variables when you reference them, in order of increasing precedence:
* Global
* Environment
* Collection
* Data
* Local
The variable with the closest scope overrides any others. For example, if you have variables named `score` in both the current collection and the active environment, and you call `pm.variables.get('score')`, Postman will return the current value of the environment variable. When you set a variable value using `pm.variables.set`, the value is local and will only persist for the current request or collection run.
```
//collection var 'score' = 1
//environment var 'score' = 2
//first request run
console.log(pm.variables.get('score'));//outputs 2
console.log(pm.collectionVariables.get('score'));//outputs 1
console.log(pm.environment.get('score'));//outputs 2
//second request run
pm.variables.set('score', 3);//local var
console.log(pm.variables.get('score'));//outputs 3
//third request run
console.log(pm.variables.get('score'));//outputs 2
```
> See the [Postman Collection SDK Variables reference](https://www.postmanlabs.com/postman-collection/Variable.html) for more detail.
You can also access variables defined in the individual scopes via [pm.environment](https://learning.postman.com/docs/writing-scripts/script-references/postman-sandbox-api-reference/#using-environment-variables-in-scripts), [pm.collectionVariables](https://learning.postman.com/docs/writing-scripts/script-references/postman-sandbox-api-reference/#using-collection-variables-in-scripts), and [pm.globals](https://learning.postman.com/docs/writing-scripts/script-references/postman-sandbox-api-reference/#using-global-variables-in-scripts).
**Using environment variables in scripts**
Your scripts can use the `pm.environment` methods to access and manipulate variables in the active (currently selected) environment.
* The name of the active environment:
```
pm.environment.name:String
```
* Check whether the environment has a variable with the specified name:
```
pm.environment.has(variableName:String):function → Boolean
```
* Get the variable with the specified name in the active environment:
```
pm.environment.get(variableName:String):function → *
```
* Set the variable with the specified name and value in the active environment:
```
pm.environment.set(variableName:String, variableValue:*):function
```
* Return the resolved value of a dynamic variable inside a script using the syntax `{{$variableName}}`:
```
pm.environment.replaceIn(variableName:String):function → *
```
> For example:
```
//environment has vars firstName and age
const stringWithVars = pm.environment.replaceIn("Hi, my name is {{firstName}} and I am {{age}}.");
console.log(stringWithVars);
```
* Return all variables with their values in the active environment in a single object:
```
pm.environment.toObject():function → Object
```
* Remove a variable from the active environment, specifying the variable by name:
```
pm.environment.unset(variableName:String):function
```
* Clear all variables in the active environment:
```
pm.environment.clear():function
```
> Note that your ability to edit variables depends on your [access level](https://learning.postman.com/docs/sending-requests/managing-environments/#working-with-environments-as-a-team) in the workspace.
**Using collection variables in scripts**
Your scripts can use the `pm.collectionVariables` methods to access and manipulate variables in the collection.
* Check whether there is a variable in the collection with the specified name:
```
pm.collectionVariables.has(variableName:String):function → Boolean
```
* Return the value of the collection variable with the specified name:
```
pm.collectionVariables.get(variableName:String):function → *
```
* Set a collection variable with the specified name and value:
```
pm.collectionVariables.set(variableName:String, variableValue:*):function
```
* Return the resolved value of a dynamic variable inside a script using the syntax `{{$variableName}}`:
```
pm.collectionVariables.replaceIn(variableName:String):function → *
```
> For example:
```
//collection has vars firstName and age
const stringWithVars = pm.collectionVariables.replaceIn("Hi, my name is {{firstName}} and I am {{age}}.");
console.log(stringWithVars);
```
* Return all variables with their values in the collection in an object:
```
pm.collectionVariables.toObject():function → Object
```
* Remove the specified variable from the collection:
```
pm.collectionVariables.unset(variableName:String):function
```
* Clear all variables from the collection:
```
pm.collectionVariables.clear():function
```
**Using global variables in scripts**
Your scripts can use the `pm.globals` methods to access and manipulate variables at global scope within the workspace.
* Check where there is a global variable with the specified name:
```
pm.globals.has(variableName:String):function → Boolean
```
* Return the value of the global variable with the specified name:
```
pm.globals.get(variableName:String):function → *
```
* Set a global variable with specified name and value:
```
pm.globals.set(variableName:String, variableValue:*):function
```
* Return the resolved value of a dynamic variable inside a script using the syntax `{{$variableName}}`:
```
pm.globals.replaceIn(variableName:String):function → String
```
> For example:
```
//globals include vars firstName and age
const stringWithVars = pm.globals.replaceIn("Hi, my name is {{firstName}} and I am {{age}}.");
console.log(stringWithVars);
```
* Return all global variables and their values in an object:
```
pm.globals.toObject():function → Object
```
* Remove the specified global variable:
```
pm.globals.unset(variableName:String):function
```
* Clear all global variables in the workspace:
```
pm.globals.clear():function
```
> Note that your ability to edit variables depends on your [access level](https://learning.postman.com/docs/sending-requests/managing-environments/#working-with-environments-as-a-team) in the workspace.
**Using data variables in scripts**
Your scripts can use the `pm.iterationData` methods to access and manipulate variables from [data files during a collection run](https://learning.postman.com/docs/running-collections/working-with-data-files/).
* Check whether a variable with the specified name exists in the current iteration data:
```
pm.iterationData.has(variableName:String):function → boolean
```
* Return a variable from the iteration data with the specified name:
```
pm.iterationData.get(variableName:String):function → *
```
* Return the iteration data variables in an object:
```
pm.iterationData.toObject():function → Object
```
* Convert the iterationData object to JSON format:
```
pm.iterationData.toJSON():function → *
```
* Remove the specified variable:
```
pm.iterationData.unset(key:String):function
```
#### Scripting with request and response data
A variety of methods provide access to request and response data in Postman scripts, including [pm.request](https://learning.postman.com/docs/writing-scripts/script-references/postman-sandbox-api-reference/#scripting-with-request-data), [pm.response](https://learning.postman.com/docs/writing-scripts/script-references/postman-sandbox-api-reference/#scripting-with-response-data), [pm.info](https://learning.postman.com/docs/writing-scripts/script-references/postman-sandbox-api-reference/#scripting-with-request-info), and [pm.cookies](https://learning.postman.com/docs/writing-scripts/script-references/postman-sandbox-api-reference/#scripting-with-request-cookies). Additionally you can send requests using [pm.sendRequest](https://learning.postman.com/docs/writing-scripts/script-references/postman-sandbox-api-reference/#sending-requests-from-scripts).
**Scripting with request data**
The `pm.request` object provides access to the data for the request the script is running within. For a **Pre-request Script** this is the request that is about to run, and for a **Test** script this is the request that has already run.
You can use the `pm.request` object pre-request scripts to alter various parts of the request configuration before it runs.
The `pm.request` object provides the following properties and methods:
* The request URL:
```
pm.request.url:Url
```
* The [list of headers](https://www.postmanlabs.com/postman-collection/HeaderList.html) for the current request:
```
pm.request.headers:HeaderList
```
* The HTTP request method:
```
pm.request.method:String
```
* The data in the [request body](https://www.postmanlabs.com/postman-collection/RequestBody.html). This object is immutable and cannot be modified from scripts:
```
pm.request.body:RequestBody
```
* Add a header with the specified name and value for the current request:
```
pm.request.headers.add(header:Header):function
```
For example:
```
pm.request.headers.add({
key: "client-id",
value: "abcdef"
});
```
* Delete the request header with the specified name:
```
pm.request.headers.remove(headerName:String):function
```
* Insert the specified header name and value (if the header does not exist, otherwise the already existing header will update to the new value):
```
pm.request.headers.upsert({key: headerName:String, value: headerValue:String}):function)
```
> See the Postman [Collection SDK Request reference](https://www.postmanlabs.com/postman-collection/Request.html) for more detail.
**Scripting with response data**
The `pm.response` object provides access to the data returned in the response for the current request in scripts added to the **Tests**.
The `pm.response` object provides the following properties and methods:
* The response status code:
```
pm.response.code:Number
```
* The status text string:
```
pm.response.status:String
```
* The [list of response headers](https://www.postmanlabs.com/postman-collection/HeaderList.html):
```
pm.response.headers:HeaderList
```
* The time the response took to receive in milliseconds:
```
pm.response.responseTime:Number
```
* The size of the response received:
```
pm.response.responseSize:Number
```
* The response text:
```
pm.response.text():Function → String
```
* The response JSON, which you can use to drill down into the properties received:
```
pm.response.json():Function → Object
```
> See the Postman [Collection SDK Response reference](https://www.postmanlabs.com/postman-collection/Response.html) for more detail.
**Scripting with request info**
The `pm.info` object provides data related to the request and the script itself, including name, ID, and iteration count.
The `pm.info` object provides the following properties and methods:
* The event, which will be either "prerequest" or "test" depending on where the script is executing within the request:
```
pm.info.eventName:String
```
* The value of the current [iteration](https://learning.postman.com/docs/running-collections/intro-to-collection-runs/):
```
pm.info.iteration:Number
```
* The total number of iterations that are scheduled to run:
```
pm.info.iterationCount:Number
```
* The saved name of the request running:
```
pm.info.requestName:String
```
* A unique GUID that identifies the running request:
```
pm.info.requestId:String
```
**Scripting with request cookies**
The `pm.cookies` object provides access to the list of cookies associated with the request.
The `pm.cookies` object provides the following properties and methods:
* Check whether a particular cookie (specified by name) exists for the requested domain:
```
pm.cookies.has(cookieName:String):Function → Boolean
```
* Get the value of the specified cookie:
```
pm.cookies.get(cookieName:String):Function → String
```
* Get a copy of all cookies and their values in an object. Returns any cookies that are defined for the request domain and path:
```
pm.cookies.toObject():Function → Object
```
> See the Postman [Collection SDK Cookie List reference](https://www.postmanlabs.com/postman-collection/CookieList.html) for more detail.
You can also use `pm.cookies.jar` to specify a domain for access to request cookies.
To enable programmatic access via the `pm.cookies.jar` methods, first [whitelist](https://learning.postman.com/docs/sending-requests/cookies/) the cookie URL.
* Access the cookie jar object:
```
pm.cookies.jar():Function → Object
```
For example:
```
const jar = pm.cookies.jar();
//cookie methods...
```
* Set a cookie using name and value:
```
jar.set(URL:String, cookie name:String, cookie value:String, callback(error, cookie)):Function → Object
```
* Set a cookie using [PostmanCookie](https://www.postmanlabs.com/postman-collection/Cookie.html) or a compatible object:
```
jar.set(URL:String, { name:String, value:String, httpOnly:Bool }, callback(error, cookie)):Function → Object
```
For example:
```
const jar = pm.cookies.jar();
jar.set("httpbin.org", "session-id", "abc123", (error, cookie) => {
if (error) {
console.error(`An error occurred: ${error}`);
} else {
console.log(`Cookie saved: ${cookie}`);
}
});
```
* Get a cookie from the cookie jar:
```
jar.get(URL:String, cookieName:String, callback (error, value)):Function → Object
```
* Get all the cookies from the cookie jar. The cookies are available in the callback function:
```
jar.getAll(URL:String, callback (error, cookies)):Function
```
* Remove a cookie:
```
jar.unset(URL:String, token:String, callback(error)):Function → Object
```
* Clear all cookies from the cookie jar:
```
jar.clear(URL:String, callback (error)):Function → Object
```
> See the Postman [Collection SDK Cookie reference](https://www.postmanlabs.com/postman-collection/Cookie.html) for more detail.
#### Sending requests from scripts
You can use the `pm.sendRequest` method to send a request asynchronously from a **Pre-request** or **Test** script. This allows you to execute logic in the background if you are carrying out computation or sending multiple requests at the same time without waiting for each to complete. You can avoid blocking issues by adding a callback function so that your code can respond when Postman receives a response. You can then carry out any additional processing you need on the response data.
You can pass the `pm.sendRequest` method a URL string, or can provide a complete request configuration in JSON including headers, method, body, [and more](http://www.postmanlabs.com/postman-collection/Request.html#~definition).
```
// Example with a plain string URL
pm.sendRequest('https://postman-echo.com/get', (error, response) => {
if (error) {
console.log(error);
} else {
console.log(response);
}
});
// Example with a full-fledged request
const postRequest = {
url: 'https://postman-echo.com/post',
method: 'POST',
header: {
'Content-Type': 'application/json',
'X-Foo': 'bar'
},
body: {
mode: 'raw',
raw: JSON.stringify({ key: 'this is json' })
}
};
pm.sendRequest(postRequest, (error, response) => {
console.log(error ? error : response.json());
});
// Example containing a test
pm.sendRequest('https://postman-echo.com/get', (error, response) => {
if (error) {
console.log(error);
}
pm.test('response should be okay to process', () => {
pm.expect(error).to.equal(null);
pm.expect(response).to.have.property('code', 200);
pm.expect(response).to.have.property('status', 'OK');
});
});
```
See the [Request definition](http://www.postmanlabs.com/postman-collection/Request.html#~definition) and [Response structure](http://www.postmanlabs.com/postman-collection/Response.html) reference docs for more detail.
### Scripting workflows
The `postman` object provides the `setNextRequest` method for building request workflows when you use the [collection runner](https://learning.postman.com/docs/running-collections/building-workflows/) or [Newman](https://learning.postman.com/docs/running-collections/using-newman-cli/command-line-integration-with-newman/).
> Note that `setNextRequest` has no effect when you run requests using the **Send** button, it only comes into effect when you run a collection.
When you run a collection (using the collection runner or Newman), Postman will run your requests in a default order or an order you specify when you set up the run. However, you can override this execution order using `postman.setNextRequest` to specify which request should run next.
* Run the specified request after this one (the request name as defined in the collection e.g. "Get customers"):
```
postman.setNextRequest(requestName:String):Function
```
* Run the specified request after this one (the request ID returned by `pm.info.requestId`):
```
postman.setNextRequest(requestId:String):Function
```
For example:
```
//script in another request calls:
//pm.environment.set('next', pm.info.requestId)
postman.setNextRequest(pm.environment.get('next'));
```
### Scripting visualizations
Use `pm.visualizer.set` to specify a template to [display response data in the visualizer](https://learning.postman.com/docs/sending-requests/visualizer/).
```
pm.visualizer.set(layout:String, data:Object, options:Object):Function
```
* `layout` **required**
* [Handlebars](https://handlebarsjs.com) HTML template string
* `data` *optional*
* JSON object that binds to the template and you can access it inside the template string
* `options` *optional*
* [Options object](https://handlebarsjs.com/api-reference/compilation.html) for `Handlebars.compile()`
Example usage:
```
var template = `{{res.info}}
`;
pm.visualizer.set(template, {
res: pm.response.json()
});
```
#### Building response data into visualizations
Use `pm.getData` to retrieve response data inside a visualization template string.
```
pm.getData(callback):Function
```
The callback function accepts two parameters:
* `error`
* Any error detail
* `data`
* Data [passed to the template](https://learning.postman.com/docs/writing-scripts/script-references/postman-sandbox-api-reference/#scripting-visualizations) by `pm.visualizer.set`
Example usage:
```
pm.getData(function (error, data) {
var value = data.res.info;
});
```
### Writing test assertions
* `pm.test(testName:String, specFunction:Function):Function`
You can use `pm.test` to write test specifications inside either the **Pre-request** or **Tests** scripts. Tests include a name and assertion—Postman will output test results as part of the response.
The `pm.test` method returns the `pm` object, making the call chainable. The following sample test checks that a response is valid to proceed.
```
pm.test("response should be okay to process", function () {
pm.response.to.not.be.error;
pm.response.to.have.jsonBody('');
pm.response.to.not.have.jsonBody('error');
});
```
An optional `done` callback can be passed to `pm.test`, to test asynchronous functions.
```
pm.test('async test', function (done) {
setTimeout(() => {
pm.expect(pm.response.code).to.equal(200);
done();
}, 1500);
});
```
* Get the total number of tests executed from a specific location in code:
```
pm.test.index():Function → Number
```
The `pm.expect` method allows you to write assertions on your response data, using [ChaiJS expect BDD](https://www.chaijs.com/api/bdd/) syntax.
```
pm.expect(assertion:*):Function → Assertion
```
You can also use `pm.response.to.have.*` and `pm.response.to.be.*` to build your assertions.
See [Test examples](https://learning.postman.com/docs/writing-scripts/script-references/test-examples/) for more assertions.
### Using external libraries
```
require(moduleName:String):function → *
```
The `require` method allows you to use the sandbox built-in library modules. The list of available libraries is listed below with links to the corresponding documentation.
* [ajv](https://www.npmjs.com/package/ajv)
* [atob](https://www.npmjs.com/package/atob)
* [btoa](https://www.npmjs.com/package/btoa)
* [chai](https://www.chaijs.com)
* [cheerio](https://cheerio.js.org)
* [crypto-js](https://www.npmjs.com/package/crypto-js)
* [csv-parse/lib/sync](https://csv.js.org/parse/)
* [lodash](https://lodash.com) (The built-in `_` object v3.10.1 exists in the sandbox by default. Use `require` to load the latest version.)
* [moment](https://momentjs.com/docs/)
* [postman-collection](http://www.postmanlabs.com/postman-collection/)
* [tv4](https://github.com/geraintluff/tv4)
* [uuid](https://www.npmjs.com/package/uuid)
* [xml2js](https://www.npmjs.com/package/xml2js)
A number of NodeJS modules are also available to use in the sandbox:
* [path](https://nodejs.org/api/path.html)
* [assert](https://nodejs.org/api/assert.html)
* [buffer](https://nodejs.org/api/buffer.html)
* [util](https://nodejs.org/api/util.html)
* [url](https://nodejs.org/api/url.html)
* [punycode](https://nodejs.org/api/punycode.html)
* [querystring](https://nodejs.org/api/querystring.html)
* [string-decoder](https://nodejs.org/api/string_decoder.html)
* [stream](https://nodejs.org/api/stream.html)
* [timers](https://nodejs.org/api/timers.html)
* [events](https://nodejs.org/api/events.html)
In order to use a library, call the `require` method, pass the module name as a parameter, and assign the return object from the method to a variable.
### Next steps
You can use tests to build Postman into your development projects in a variety of ways using [Postman utilities](https://learning.postman.com/docs/developer/resources-intro/).